
Original image
step 1 of 13
I used liquify to push the head around to the direction I wanted and lenthen the bill

step 2 of 13
I used a layer mask to get the shape of the birds body from the source bird. A part of the neck was copied, warp to curve them and then smudge to blend them.

step 3 of 13
I took a wing from the source and then shaped it using warp and a layer mask. I used part of the foot for the legs. I originally wanted the bird to be standing on one leg, but I couldn't get it to look right, so I made him stand on two legs. I used brightness to lighten up the blue streak.

step 4 of 13
The water is part of the ceiling, as are the weeds. I used levels and brightness/contrast to change the color. The "sticks" are also from the source and will be used later. I forgot to mention earlier that I used the clone tool for the leg feathers, cloning from the bird's body.

step 5 of 13
To smudge the weeds, I chose a stiple brush, enlarged it (from 19 to...32?...) and put the strength to around 75%. The different parts of the ceiling already had different shades, so I didn't need to do anything with that.

step 6 of 13
I used distort on the large stick, lengthening it and making it skinny. Brightness to lighten it up.

step 7 of 13
I wanted the cattail stems to be brown, so I used adjustment layers. This shows what it looks like when you use color balance, hue/saturation, levels and brightness/ contrast adjustment layers above the layers you want to change. The second picture shows what it looks like after you've merged them down on the level you're changing and then desaturating a little bit, as well as making them a bit darker. I used the same source part for the fuzzy cattails, the same technique to change their color and then smudge to make them fuzzy.

step 8 of 13
I used the smooth part of the ceiling for the cattail leaves, changing the color and using warp to bend them. The sky is a copy of the water, stretched out with distort, reduced opacity of 80% and then color adjustment layer, adding a small amount of yellow, red and magenta.

step 9 of 13
The lilly pads are the center part of the light, color adjusted and then brightness/contrast and levels adjustment layers.

step 10 of 13
The lilly is made from the smooth part of the ceiling, color adjusted, with dodge and burn. I used the warp tool to bend the petals and when I had gotten the large version the way I wanted it to look, I merged all the layers and used distort to shrink it.

step 11 of 13
I made copies of the parts that would be reflected in the water, flipped them vertically and then distorted the height to 30%. In the second image, I made a copy of the water, reduced the opacity to about 25% and put that layer over the reflections.

step 12 of 13
I wanted the reflections to ripple, so I tried smudging them. No good. I tried various filters. No good. So I searched the internet for a tut on how to ripple reflections. I found one that was way too complicated, but it lead me to experiment on my own. Its all about distortion maps. I tried using "render clouds" to make a distortion map, but I didn't like the way it looked, so I made my own distortion map, pictured to the right. Success!

step 13 of 13
In the first image, I changed the layer style of the reflection layer to multiply. A copy of the normal reflections and the second image shows overlay. I wanted ripples on the water as well, so I tried my displacement map on that. No good. (Yeah, I know NOW you've got to have something to displace lol) Instead, I reduced the opacity of my map and slipped it under the copy of water layer that I had layer styled to screen (as seen in the 4th image). Success! The 5th image shows all elements together. I put clouds in the sky by making a copy of the sky, reducing opacity and then using the dodge tool with a faux finish brush.

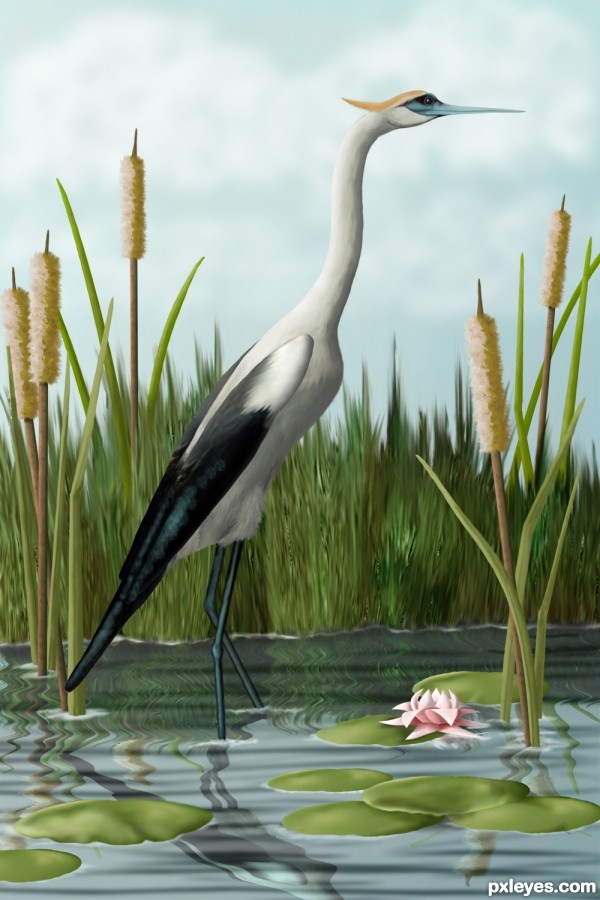
Final result
Votes
| user | voted |
| velkanx | |
| Nickk | |
| jbillitteri | |
| Disco | |
| swordfish | |
| hereisanoop | |
| wtfayla | |
| Clinge | |
| Krystian | |
| tnaggar | |
| Chalty669 | |
| skeletor | |
| telmafrancione | |
| CMYK46 | |
| nanaris | |
| Score: 10 | |
Comments
Pxleyes
Photography and photoshop contests
We are a community of people with
a passion for photography, graphics and art in general.
Every day new photoshop
and photography contests are posted to compete in. We also have one weekly drawing contest
and one weekly 3D contest!
Participation is 100% free!
Just
register and get
started!
Good luck!
Follow us:


© 2015 Pxleyes.com. All rights reserved.
perfect .........
(5 years and 3620 days ago)Just amazing !
(5 years and 3616 days ago)