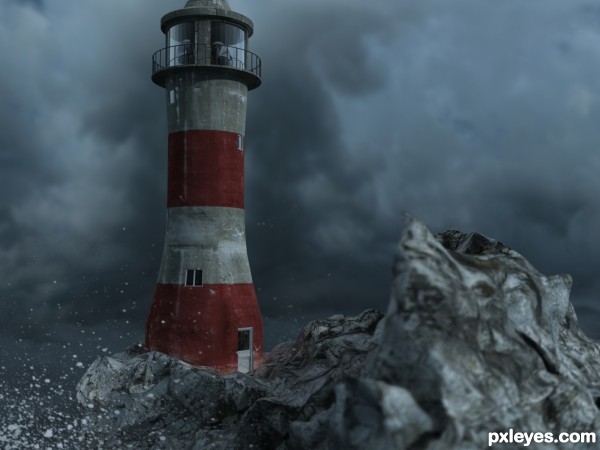
A Work in Progress: Lights out


This guide was made for entry:
Lights out
In Contest:
texturize


step 1 of 12

I started with a simple cylinder. I firstly gave it 50 sides for a much rounder shape. Then I added the Taper modifier to get a simple lighthouse shape. I then converted down to an editable polygon. I deleted the polygons from the base, the I used polygon modeling to create the lighthouse itself. The railings were 1 cylinder duplicated and arranged with the array tool.

Creation of Lights out: Step 1

step 2 of 12

The rocks were not to difficult. I downloaded a free Maxscript called "Asteroid creator" (see link) using this I created one simple rock shape. I added a displace modifier (not Vray displace) using the bitmap I had for the texture as a map for the displace. Setting the displace amount as 1.0. I then added the turbosmooth with 2 iterations.

Creation of Lights out: Step 2

step 3 of 12

The ocean is a simple plane with 200 sections for the height and width. Then I added a noise modifier. Then added a turbosmooth.

Creation of Lights out: Step 3

step 4 of 12

The sky background is a cylinder with 50 sides. I removed the top and bottom caps, then added the normal modifier to flip the normals. I added a UVmap modifier to correct the stretch, with the mapping set to Cylinder, uncapped.

Creation of Lights out: Step 4

step 5 of 12

This is a shot of the lighting rig. I have 1 target direct set up for the sun, which is placed in the approximate position as the sun on the background image. This is set to 0.5 on the intensity. The colour of the light is a darkish blue, sampled from the background image. 1 omni light to light the background with all other objects excluded. 1 omni to light the alpha plane with the sea spray on.

Creation of Lights out: Step 5

step 6 of 12

I used a standard camera, with the target on the lighthouse. I enabled the "Depth of field" multipass option to give some nice DOF to the image.

Creation of Lights out: Step 6

step 7 of 12

This is the rock material. I used a falloff map for the reflection, and set the reflection glossiness to 0.5. The other materials are either mentioned in the links section, or I created myself.

Creation of Lights out: Step 7

step 8 of 12

This is the flattened, rendered UVW map for the lighthouse.

Creation of Lights out: Step 8

step 9 of 12

This is the finished lighthouse texture. I went into PS created a red/white striped layer which I overlayed the concrete texture onto. Using the Heal/clone/content aware delete, I might it continuous and not identical.

Creation of Lights out: Step 9

step 10 of 12

This is the displacement map for the lighthouse, this was created in "Crazybump" A special program that creates maps for 3D programs.

Creation of Lights out: Step 10

step 11 of 12

This is the specularity map for the lighthouse. This was again created in "CrazyBump"

Creation of Lights out: Step 11

step 12 of 12

This is the sea spray. I painted this in PS. I used a standard brush, played around with the scatter controls until I was happy with the result. Because this is also Black and white, I could use it as an opacity map as well. So I placed this texture on a plane in front of the camera, added the opacity, and lit it with an omni.

Creation of Lights out: Step 12

Final result

Creation of Lights out: Final Result

LOGIN or REGISTER FOR FREE
to rate this guide and create your own guides.

Votes


uservoted
derdevil
Score:
10