
Original image
step 1 of 8
Place the orange, mask, refine edge, resize and rotate as needed.

step 2 of 8
Using different brush sizes for the smudge tool, smudge the orange to create a tail.

step 3 of 8
Create a new layer. Select the brush tool, set the diameter to roughly the same size as the orange and hardness to 0%.
Set the foreground color to orange (I used the color picker to get shades from the source image). Apply the brush.
Choose a lighter color (yellow) and a smaller brush and click on the center of the first one.
Again, make the brush smaller and use white for the color. Apply at the center.
With the smudge tool, create a tail.
Lower the opacity of the brush layer to 50%.
This is what it looks like with the orange layer hidden.
or

step 4 of 8
Create a new layer under the orange layer and with a soft brush, create a glow behind comet.

step 5 of 8
Group the comet layers together.
Create a new layer above the background stars layer. Set the foreground color to white and lower the layer opacity (mine is a 56%).
Using a soft brush and at different sizes, put some stars on the background. Go to Filter-Blur-Blur.
Create a new layer above the background stars layer. Set the foreground color to white and lower the layer opacity (mine is a 56%).
Using a soft brush and at different sizes, put some stars on the background. Go to Filter-Blur-Blur.

step 6 of 8
Make 3 copies of the comet group. Resize and position. Lower the group opacity depending on the distance (the further/smaller, the lower).
Add a Photo Filter Adjustment layer. I used Deep Yellow for the filter.
That's it.
Add a Photo Filter Adjustment layer. I used Deep Yellow for the filter.
That's it.

step 7 of 8
(Step1) Create a new layer for the stars, fill with black. Select Filter-Noise-Add noise (30%, Uniform, Monochromatic).
Add a Levels Adjustment to the stars layer (ctrl+click between the two layers to clip) and make necessary adjustments.
Add the texture, resize/rotate to fill the canvas. Apply Invert and Layers Adjustment layers to the texture layer.
Add a Levels Adjustment to the stars layer (ctrl+click between the two layers to clip) and make necessary adjustments.
Add the texture, resize/rotate to fill the canvas. Apply Invert and Layers Adjustment layers to the texture layer.

step 8 of 8
(Step 6) Create new layers. With the lasso tool set at 100% Feather, make two shapes on the empty spaces.
Go to Filter-Render-Clouds. Apply a Gradient overlay (blues/yellows) and set blend mode to Multiply. Turn down the opacity of the layers to 50%
Apply masks on the layers where the stars shouldn't be showing.
Go to Filter-Render-Clouds. Apply a Gradient overlay (blues/yellows) and set blend mode to Multiply. Turn down the opacity of the layers to 50%
Apply masks on the layers where the stars shouldn't be showing.

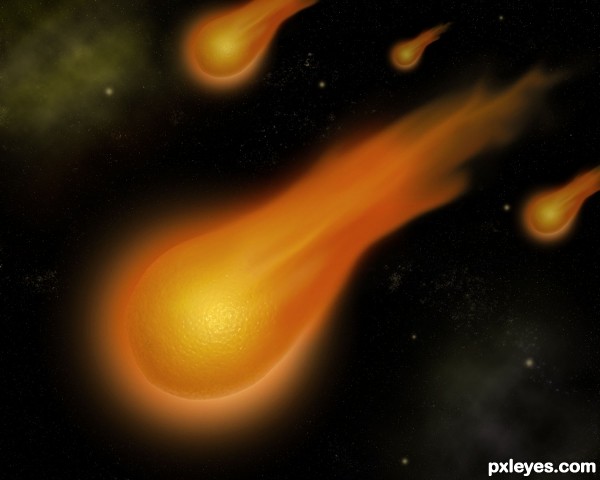
Final result
Pxleyes
Photography and photoshop contests
We are a community of people with
a passion for photography, graphics and art in general.
Every day new photoshop
and photography contests are posted to compete in. We also have one weekly drawing contest
and one weekly 3D contest!
Participation is 100% free!
Just
register and get
started!
Good luck!
Follow us:


© 2015 Pxleyes.com. All rights reserved.