
Original image
step 1 of 13
This is my own stock photo that I used for my background

step 2 of 13
The rose hip removed, I used it to create the head and face by using dodge and burn and a bit of liquify to give a bit of shape.

step 3 of 13
result of burn and dodge with eyes painted in this is where the liquify helps with the shaping

step 4 of 13
Once the rose was removed from the stem and flipped upside down, use warp to shape a bit to look like a dress that will fit the fairy.

step 5 of 13
Using the leaves, shape large one using the warp tool to create body shape. Smaller ones will be used in the same manner for the arms and legs.

step 6 of 13
Using dodge and burn give your body parts some depth.

step 7 of 13
Assemble all fairy parts adjusting shapes as you go. Create a brush for hair by using a fine tip brush and make 6 or 8 dots scattered and define as custom brush. Use this new brush to brush out some hair in a style you like. Fairy is done.

step 8 of 13
Using a couple of pieces of the rose stems put together. Pull out wide and begin to use the smudge tool to pull out limbs and roots. Swirl the colors on the stems to give a woody appearance.

step 9 of 13
Using one of the leaves convert to grey scale and define as custom brush. Using this brush create leafy areas using different green colors. Create in layers.

step 10 of 13
Using two leaves, put together and shape to create the mushroom cap. Using a piece of the thorny stem, create the mushroom stem. Use some dodge and burn to give dimension.

step 11 of 13
Cut out a rose petal and shape using warp tool, this will create the wing of the butterfly. Draw out the body and duplicate the wing and assemble to create the butterfly. Using different gradient overlays, will give some interesting colors. Now is the time to assemble the whole thing.

step 12 of 13
Start by adding objects that could be helped by tinting to unify the whole picture.

step 13 of 13
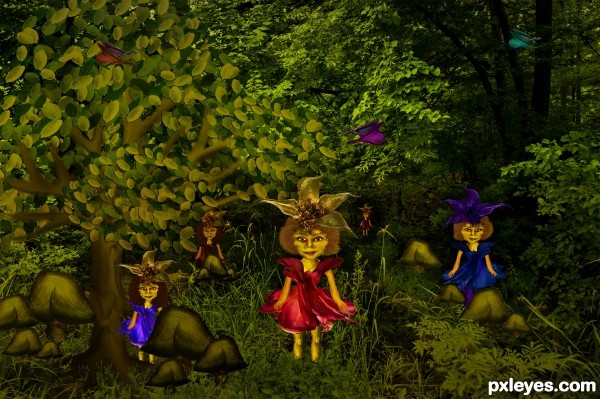
Add a layer and fill with gradient of greens and yellows and set to multiply to make things more natural. Finish adding the parts and using dodge and burn to darken areas you think need to be darker and brighten others. Mask out areas that you want to appear to be behind things. Add naturalizing by exposing grasses in front of objects added in.

Final result
Pxleyes
Photography and photoshop contests
We are a community of people with
a passion for photography, graphics and art in general.
Every day new photoshop
and photography contests are posted to compete in. We also have one weekly drawing contest
and one weekly 3D contest!
Participation is 100% free!
Just
register and get
started!
Good luck!
Follow us:


© 2015 Pxleyes.com. All rights reserved.