
Original image
step 1 of 9
Remove the starbucks cup and place it into the main image. Using the warp too give it the look of being crushed. Mask areas of it to allow some of the foliage to show in front of it. Add shadowing and highlights as needed with dodge and burn tools

step 2 of 9
Remove an ant from it's photo and position it on the cup, using a color overlay to change the color of it.

step 3 of 9
Remove the doughnut from it's picture and move it over to the main image using warp tool to help it to lay fairly naturally. Mask out some of the sticks and foliage so that it looks like it belongs there.

step 4 of 9
Add some more ants and then remove the flying dragonfly from it's picture and place it in the main image. masking out the wings with a low opacity to give them a transparent look.

step 5 of 9
Take the caterpillar from it's pic and position it on the small step in the main image.

step 6 of 9
You will continue taking images from their original pics and placing them in the main image masking where necessary and burning and dodging to give depth.

step 7 of 9
Now let's start on creating the rain

step 8 of 9

step 9 of 9
Once your steps at creating your rain is complete the final step is to add a curves adjustment layer to give a unifying tone to the entire piece.

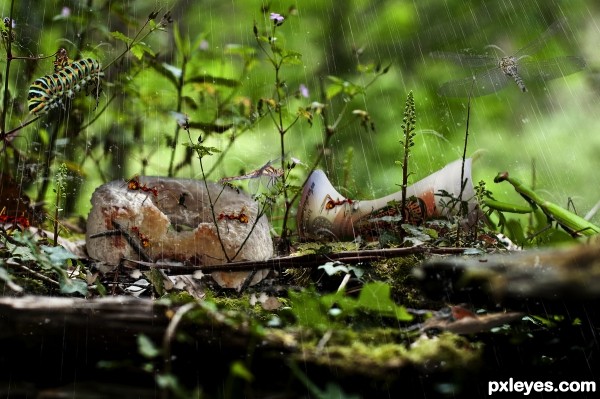
Final result
Pxleyes
Photography and photoshop contests
We are a community of people with
a passion for photography, graphics and art in general.
Every day new photoshop
and photography contests are posted to compete in. We also have one weekly drawing contest
and one weekly 3D contest!
Participation is 100% free!
Just
register and get
started!
Good luck!
Follow us:


© 2015 Pxleyes.com. All rights reserved.