
Original image
step 1 of 6
I added the grass several times and blended it, to make it look like one big field. I also enlarged the image to the side, with using the clone stamp tool for the sky on the right side of the picture.
I added the path and blended it with a soft big eraser.
I added the path and blended it with a soft big eraser.

step 2 of 6
I cut out the hourglass and placed it on the background. With a soft eraser with opacity set to 10, I erased the former background so far, that the wood texture wasn't visible anymore.
I copied the sand, the reflections and the running sand from the original source and placed it on the new one. I can't show the single steps, because I merged those layers and noticed it too late... *sigh*
I desaturated the two big reflections and lowered the opacity to achieve the same look as in the original.
Furthermore I changed the colour via Hue/Saturation to blue. I did that twice, once with a lighter blue, the other time with a darker blue. I lowered the opacity from the dark blue layer, so it doesn't really effect the sand colour, but it makes the glass look more "glassy"

step 3 of 6
I added the two animals. I shortened the legs from the horse and warped the front right leg, so it hangs down. The parts in the back from the horse I painted over with a similar colour to the one the sky has. Unfortunately there were parts from a house before.
I also added the tree textures to make it look less like metal.
I also added the tree textures to make it look less like metal.

step 4 of 6
I changed the colour from the statues via Hue/Saturation and colour match and added the hour glasses. Also some dodge and burn to fit the light source.

step 5 of 6
I added the barbed wire and the leaves. The colour of the leaves was again changed with Hue/Sat. I erased some parts here and there to make all look different.

step 6 of 6
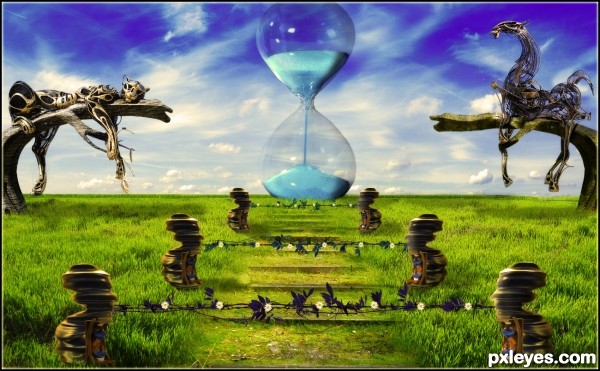
Finally I added a dark yellow photofilter and an extra layer with gaussian blur and blending mode set to soft light.

Final result
Pxleyes
Photography and photoshop contests
We are a community of people with
a passion for photography, graphics and art in general.
Every day new photoshop
and photography contests are posted to compete in. We also have one weekly drawing contest
and one weekly 3D contest!
Participation is 100% free!
Just
register and get
started!
Good luck!
Follow us:


© 2015 Pxleyes.com. All rights reserved.