
Original image
step 1 of 21
Create new document.
Set width and hight to 10 inches.
Resolution to 180 pixels/inch
Set width and hight to 10 inches.
Resolution to 180 pixels/inch

step 2 of 21
fill Background layer with Black

step 3 of 21
now we start making the planets.
Use the eliptical marquee tool..
hold shift as you drag to make a perfect circle
Use the eliptical marquee tool..
hold shift as you drag to make a perfect circle

step 4 of 21
chose a color scheme that you like.
i used Blue for the foreground color and Yellow for the background color in my color selector
then you want to render come clouds by selecting Filter from the menu bar, go down to Render, and chose Clouds.
then as an added touch i then chose Filter>Render>Difference Clouds.. then used the keyboard shortcut Ctrl+F to cycle through variences of the difference clouds.

step 5 of 21
With the selection still active,
go to the Filter menu, chose Distort>Spherize.
go to the Filter menu, chose Distort>Spherize.

step 6 of 21
In the Spherize dialogue box set the Amount to 100%.

step 7 of 21
Your image should look similar to this

step 8 of 21
Double click the layer containing the planet that was just created.
In the dialogue box click Bevel and Emboss in the list on the left side.
these are the settings i used
In the dialogue box click Bevel and Emboss in the list on the left side.
these are the settings i used

step 9 of 21
Next chose Gradient Overlay
in the Gradient selector box chose the Foreground to Transparent option..
Select the angle and blending modes to your desire..
These are the settings i used
in the Gradient selector box chose the Foreground to Transparent option..
Select the angle and blending modes to your desire..
These are the settings i used

step 10 of 21
Your planet should look more realistic now..
You may repeat the process to creat as many as you like..
I only used two for this project
You may repeat the process to creat as many as you like..
I only used two for this project

step 11 of 21
now i added a layer underneath my planet layers.
i used brushes created by Sunira to create the space clouds..
these brushes can be downloaded at
http://sunira.deviantart.com/art/Nebulae-Brushes-18959502
and
http://sunira.deviantart.com/art/Galaxies-II-74466324
i used brushes created by Sunira to create the space clouds..
these brushes can be downloaded at
http://sunira.deviantart.com/art/Nebulae-Brushes-18959502
and
http://sunira.deviantart.com/art/Galaxies-II-74466324

step 12 of 21
Next i created the explosion on one of my planets.
Create a new layer above the planet of choice.
I used a small Soft round brush.
I painted the area white. i tried to visualize how an explosion would look.
then i used the Smudge tool to create the blast trail look starting from the center and working my way out
Create a new layer above the planet of choice.
I used a small Soft round brush.
I painted the area white. i tried to visualize how an explosion would look.
then i used the Smudge tool to create the blast trail look starting from the center and working my way out

step 13 of 21
Duplicate the layer that was created in the previous step.
Select the Burn tool.
I used the preset Scattered Maple Leaves brush.
Set the range to Highlights.
then i painted some shadows.
Select the Burn tool.
I used the preset Scattered Maple Leaves brush.
Set the range to Highlights.
then i painted some shadows.

step 14 of 21
Duplicate the layer that was just created.
Set the blend mode to Color Burn.
Adjust the Hue/Saturation to achieve the look of an explosion
Set the blend mode to Color Burn.
Adjust the Hue/Saturation to achieve the look of an explosion

step 15 of 21
I duplicated one of the three previous layers.
Moved the new duplicate layer to underneath the first explosion layer.
Added a Black Color overlay and changed the Opacity to approximately 50% to create a shadow of the explosion
painted the cracks using a small hard round brush.
Paint one crack then duplicate as needed
Moved the new duplicate layer to underneath the first explosion layer.
Added a Black Color overlay and changed the Opacity to approximately 50% to create a shadow of the explosion
painted the cracks using a small hard round brush.
Paint one crack then duplicate as needed

step 16 of 21
Next we need to make the window of the space ship.
Using the source image for the contest...
Select the Magic Wand tool.
Set the Tolerance to approximately 40.
Click inside the green color to select it.
Using the source image for the contest...
Select the Magic Wand tool.
Set the Tolerance to approximately 40.
Click inside the green color to select it.

step 17 of 21
What we want is the outside area mot the green part..
Click Select on the Menu bar, then Inverse.
this selects all the other areas
Click Select on the Menu bar, then Inverse.
this selects all the other areas

step 18 of 21
Next we need to make this selection look more "Alien".
Copy the selection and paste it into a new layer.
Select Filter>Filter Gallery from the Menu bar.
Play around with the different filters to achieve the desired effect.
You can add filters by clicking the New Effect Layer at the bottom right of this Dialogue box.
These are the Effects i used
Copy the selection and paste it into a new layer.
Select Filter>Filter Gallery from the Menu bar.
Play around with the different filters to achieve the desired effect.
You can add filters by clicking the New Effect Layer at the bottom right of this Dialogue box.
These are the Effects i used

step 19 of 21
Copy the Layer that you just manipulated and Paste it into the project we are creating..
Use the Move Tool to Scale and Rotate as needed
Use the Move Tool to Scale and Rotate as needed

step 20 of 21
Next i added my Alien friend.
The image i used was from Liber.
It can be downloaded at:
http://www.flickr.com/photos/liberato/218178150/sizes/l/
The image i used was from Liber.
It can be downloaded at:
http://www.flickr.com/photos/liberato/218178150/sizes/l/

- 2: source 2
step 21 of 21
Finally.
T create the reflections on the "window" is duplicated the Alien layer and the layer from the contest source image..
I arranged those layers underneath the original "window" layer and set their Opacity to aroun 20-30%
T create the reflections on the "window" is duplicated the Alien layer and the layer from the contest source image..
I arranged those layers underneath the original "window" layer and set their Opacity to aroun 20-30%

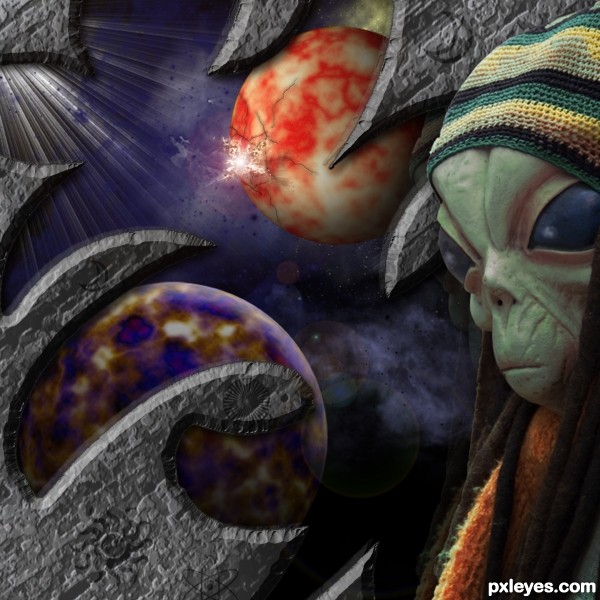
Final result
Comments
Pxleyes
Photography and photoshop contests
We are a community of people with
a passion for photography, graphics and art in general.
Every day new photoshop
and photography contests are posted to compete in. We also have one weekly drawing contest
and one weekly 3D contest!
Participation is 100% free!
Just
register and get
started!
Good luck!
Follow us:


© 2015 Pxleyes.com. All rights reserved.
You know, if you just put some more screen shots into what specific tools use used to create the spheres with the outer space, this could be a really useful guide. They're done very well and I appreciate the list of tools use but more screens shots would benefit. That's just IMO.
(5 years and 3718 days ago)Thanks for the tip jawshoewhah. Maybe this new guide will help a bit
(5 years and 3718 days ago)This is much better!
(5 years and 3712 days ago)