
Original image
step 1 of 5
Open the source image in photoshop to start working and leave the layer’s name as “Backgroundâ€. Then go to Filter> Blur> Gaussian blur, Radius: 74.4 pixel

step 2 of 5
Make a new layer “Flower Vase†and select the flower image with quick selection tool from source image and bring it on new created layer by selection tool.
Go to Filter> Artistic > Plastic wrap: Highlight strength 15, Detail: 9, Smoothness: 7.
Now go to blending option and follow my combination with color# c5c5c5.
Filter> Liquify> Brush size:100, Density: 50, Pressure: 100.
Go to Filter> Artistic > Plastic wrap: Highlight strength 15, Detail: 9, Smoothness: 7.
Now go to blending option and follow my combination with color# c5c5c5.
Filter> Liquify> Brush size:100, Density: 50, Pressure: 100.

step 3 of 5
Create a new layer above the “Background†layer’s.
Make a stick with rounded rectangle tool (u) and name it “stick 1â€.
Widht: 25 px, Height: 1200 px, Radius†5 px, color# 2e9a3d.
Blending option: Gradient overlay, opacity-100%.
Go to Edit> Free transform (Ctrl+t)> Wrap
Right click the layer “stick 1†and select duplicate layer and name the new layer “stick 2â€.
Rotate the layer and wrap it just like the image.
Duplicate the layer “stick 2†and name the new layer “Stick 3â€.
Go to Edit> Free transform (Ctrl+t)> Flip Horizontal
Duplicate the layer “stick 3†and name the new layer “Stick 4â€.
Go to Edit> Free transform (Ctrl+t)> Skew, distort and wrap.
Now make a group by all stick layer and name the group “stick groupâ€.

step 4 of 5
Make a new layer above the layer “flower vase†and name it “white flowerâ€.
Go to Image> Adjustment> Brightness: +38, Contrast: +100.
Layer> Layer style> Inner shadow.
Go to Image> Adjustment> Brightness: +38, Contrast: +100.
Layer> Layer style> Inner shadow.

step 5 of 5
Now duplicate the layer “white flower†three (3) times and name them “red flower 1â€, “red flower 2†and “red flower 3â€. Those “red flower†layers will be below of “white flower†layer.
Color on “red flower 1†by color replace tool (B), Brush size will be 45, color # 960e03, tolerance 100% and rotate the flower 90 degree CCW.
Select the flower’s middle yellow site by quick selection tool.
Go to Image> Adjustments> Hue- 13, Saturation – 0, Lightness – 0 and then go to blending option> Inner shadow.
Just do the same work on layer “red flower 2, 3 and 4â€.
Work on “red flower 3â€:-
Edit> Transform> Distort> wrap as per image.
Now make a Group by all flowers group and name it “Flower Groupâ€
This is the end of this tutorial. I do hope you learned something from it.
Do not hesitate to ask any questions, if you have any doubts about anything you want to learn, ask, I will be willing to help and give you ideas.
Thank you so much, and good luck!

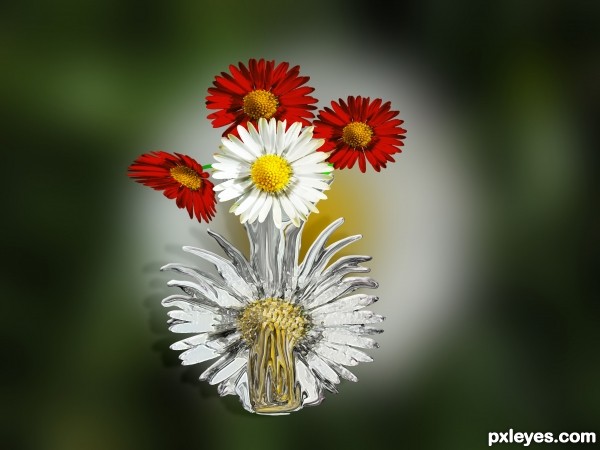
Final result
Pxleyes
Photography and photoshop contests
We are a community of people with
a passion for photography, graphics and art in general.
Every day new photoshop
and photography contests are posted to compete in. We also have one weekly drawing contest
and one weekly 3D contest!
Participation is 100% free!
Just
register and get
started!
Good luck!
Follow us:


© 2015 Pxleyes.com. All rights reserved.