
Original image
step 1 of 6
Okay so I started with this picture of Reyna Zullo, my model. I used only one light to create the dramatic lighting contrast you can see. I used a white sheet stapled to my wall as a background lol.
Taken with my Olympus camera.
Taken with my Olympus camera.

step 2 of 6
Then I put Reyna and the dog on the background I picked out. I wanted something lush and inviting to match the model's outfit.... Which is sorta springish. Anyhow, then I tried to cut ethem out the best I could and moved onto the next step....

- : source
step 3 of 6
Then I moved the dog a bunch more times! I think the best way to have done this probably would have been to make the dog into a brush first but I went the hard way and cut each one of these out after resizing them all with the free transform tool. Different sizes to create "depth".

step 4 of 6
Then I used some cloud brushes and some white and light yellow lighting with the air brush tool on a low opacity. Then I tried to reshadow beneath the dogs to match the direction of the lighting in the picture, not I shined the light towards the model to try and stay with the lighting of the original picture to make it look more natural.

step 5 of 6
Then I put a photo filter on in an orange sort of color and went to saturation and lessened it to make it have a moody feel.

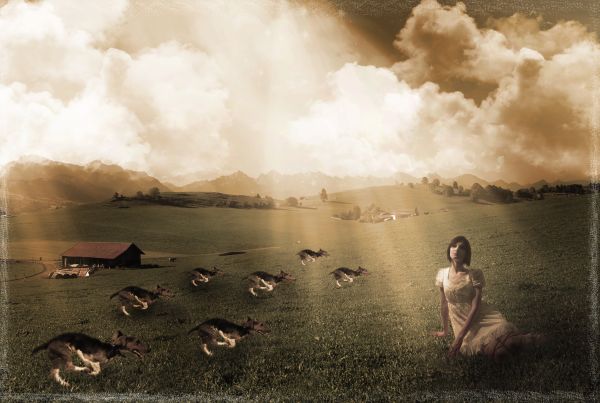
step 6 of 6
Finally I just added some little "lights" around the border for edges, and used the burn tool to define different spots of the landscape and sky to bring it all together. Also used smudge tool on the grass in front of the model and on models hair to blend her in a little more.

Final result
Pxleyes
Photography and photoshop contests
We are a community of people with
a passion for photography, graphics and art in general.
Every day new photoshop
and photography contests are posted to compete in. We also have one weekly drawing contest
and one weekly 3D contest!
Participation is 100% free!
Just
register and get
started!
Good luck!
Follow us:


© 2015 Pxleyes.com. All rights reserved.