
Original image
step 1 of 9
Source image.

step 2 of 9
Outsource image.

step 3 of 9
Used blur filter on the background.

step 4 of 9
Copied and pasted part of a petal; used liquify filter and smudge tool to give it shape of wings.

step 5 of 9
After made one wing, merged leyers and duplicated it, flipping to make the other wing.

step 6 of 9
Copied and pasted part of a petal; using liquify and smudge tool, made the body.

step 7 of 9
With warp tool only on the head, I modeled the shape of it; after that, copied a yellow part of a petal and made the beak. On a new layer I wrote the eyes, using a soft brush with the colors of the source and worked on it with smudge tool. Also made nose holes.

step 8 of 9
Copied and pasted a small part of a petal, and using liquify and smudge, made the quiff.
PS: On step 5 I also duplicated the wings and made shadows.
PS: On step 5 I also duplicated the wings and made shadows.

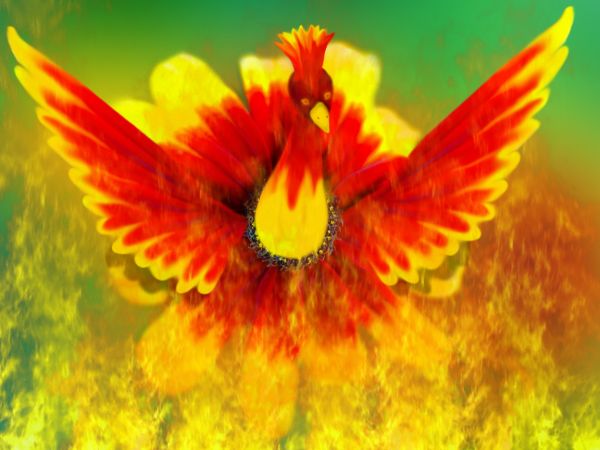
step 9 of 9
I took the outsource image, selectioned red channel, and dragged to my image. Copied and pasted some 5 or 6 times, and marged the layers, putting it on the top. After doing that, used burn tool to create some shadows on the flower, behind the wings and the body. Also erased unwanted parts of the wings shadows.

Final result
Pxleyes
Photography and photoshop contests
We are a community of people with
a passion for photography, graphics and art in general.
Every day new photoshop
and photography contests are posted to compete in. We also have one weekly drawing contest
and one weekly 3D contest!
Participation is 100% free!
Just
register and get
started!
Good luck!
Follow us:


© 2015 Pxleyes.com. All rights reserved.