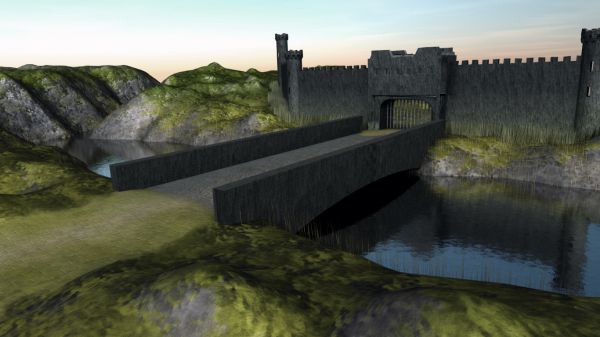
A Work in Progress: Dark age


This guide was made for entry:
Dark age
In Contest:
castles


step 1 of 4

The towers were made from a simple cylinder. It was beveled into shape on the top and then extruded down along the cylinder to create the patterns. The top bricks was then beveled. The tower was then knifed to create more subdivisions for the windows. The windows was beveled inwards.

The gate building came from a simple box. It divided by the knife tool. The entry was solid drilled with a door shaped mesh for the contours. Windows and bricks was then beveled or extruded into shape. The gate was stretched and a gate, made from boxes, was modeled to fill the gap.

The towers was then duplicated and a wall was modeled from simple boxes to between the buildings.

All main parts was then jittered to get individual variations.

Creation of Dark age: Step 1

step 2 of 4

The surrounding landscape was made from a subdivided fractalized box. Along the subdivision I adjusted various parts for variation and made the river and flatted out the road.

I then added the grass along the wall and the reed along the lake with the FiberFX tool (hair generator).

The bridge was modeled out of a box that I knifed and beveled into a simple shape. The bottom arc was boolean subtracted out of a large cylinder. I then jittered the bridge to make it less geometric.

I then added a single flat planed box for water and adjusted the height.

Creation of Dark age: Step 2

step 3 of 4

All textures was made from combinations of procedurals and gradient textures. No UV's, and thus no image maps were used.

1. The wall was textured with a brick pattern for bump, with multiple procedurals adding the worn out look. At the bottom I added some green vein like coloring to blend better with the grass along the wall.

2. The wall texture was copied, but made a little bit lighter, and less green at the bottom.

3. ...same thing with the towers, but the green vein coloring went higher.

4. ...and same thing with the bridge, but without the green, and a little bit more diffuse.

5. The brick bumping was copied from the previous pattern, but dirt was added to blend better with the border to the landscape texturing.

6. A whole lot of procedurals to start with. It also has gradients to make it more rocky depending on how steep it is. It's also more diffuse the higher it goes (impossible to explain in a simple SBS).

7. The water was quickly made with 3 different bump procedurals. Usually it should have a fresnel effect, but to save time, i made it 0% transparent and adjusted the viewing angle.

8. The road was lightly bricked with bump to make a soft transition to the bridge. It also has some dirt procedurals with fall off to the landscape.

9. Skytracer plugin, with the time set to year 1500 london, 06:00.

Creation of Dark age: Step 3

step 4 of 4

The scene was set up with only one light, coming from behind the camera. It's a dome to create more daylight feeling. With more time I would have added a HDRI dome instead.

Medium AA, medium AS, no global illumination due to the dome light.

Creation of Dark age: Step 4

Final result

Creation of Dark age: Final Result

LOGIN or REGISTER FOR FREE
to rate this guide and create your own guides.

Votes


uservoted
stancu5
Score:
8