
Original image
step 1 of 4
Open up original image.

step 2 of 4
Go to image adjustments and levels. Mess around with the levels until you get a dark look.

step 3 of 4
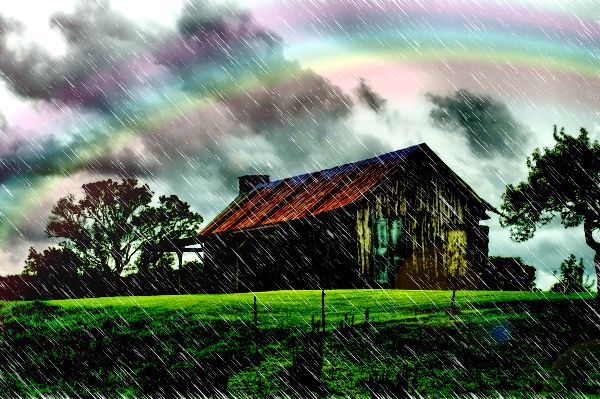
ADD THE RAIN and Lens Flare
Add a new Layer
Filter > Noise > Add Noise (Settings: 81.17%, Gaussian, Monochromatic)
Filter > Blur > Motion Blur
(Settings: -47 degree angle, Distance 24 pixels)
Image > Image Adjustments > Levels
(Input: 201; 1.00; 255)
Go to layer palette and change blending mode to Screen.
Render>Lens Flare
Add a new Layer
Filter > Noise > Add Noise (Settings: 81.17%, Gaussian, Monochromatic)
Filter > Blur > Motion Blur
(Settings: -47 degree angle, Distance 24 pixels)
Image > Image Adjustments > Levels
(Input: 201; 1.00; 255)
Go to layer palette and change blending mode to Screen.
Render>Lens Flare

step 4 of 4
ADD A RAINBOW
1) Open the gardiant tool
2) Select transparent rainbow
3)Adjust the settings
4)Choose the radial gardiant on toolbar and draw a line
5) Filter>Distort>Polar Coordinates
6) Erase any unwanted parts.
1) Open the gardiant tool
2) Select transparent rainbow
3)Adjust the settings
4)Choose the radial gardiant on toolbar and draw a line
5) Filter>Distort>Polar Coordinates
6) Erase any unwanted parts.

Final result
Pxleyes
Photography and photoshop contests
We are a community of people with
a passion for photography, graphics and art in general.
Every day new photoshop
and photography contests are posted to compete in. We also have one weekly drawing contest
and one weekly 3D contest!
Participation is 100% free!
Just
register and get
started!
Good luck!
Follow us:


© 2015 Pxleyes.com. All rights reserved.