
Original image
step 1 of 17
I divided the man's face here and mirrored the right half, deleting the left.

step 2 of 17
Copied the face half and mirrored it.

step 3 of 17
Used liquify to narrow the man's nose and used the erase to cut off a bit of his sticking-up hair.

step 4 of 17
Carefully selected the man's glasses.

step 5 of 17
...then deleted the glasses with the clone stamp tool and healing brush.

step 6 of 17
Deleted the glasses. Note how I got rid of the second face half. I'm going to mirror it again so that I don't have to erase the glasses on the second half.

step 7 of 17
Mirrored the left face half. Now he has no glasses.

step 8 of 17
Used the healing brush to fix his forehead and hair so that it doesn't look too obviously mirrored.

step 9 of 17
Here I used the healing brush to take parts of his hair and turn it into a short beard.

step 10 of 17
Selecting the eyes, moving them, then touching up with the healing brush, brings the eyes closer together and not so unrealisticly far apart.

step 11 of 17

step 12 of 17
Placed the robe into the entry file. I used the eraser to blacken out parts of the robe.

step 13 of 17
After cutting the hands onto a seperate layer, I adjust color and contrast on the robe to make it fit the overshadowed look of the head.

step 14 of 17
Here I used colorizing saturation adjustments on the hands and robe to give the hands a solid skin tone, and the robe a red tinge.

step 15 of 17
After using the dodge tool to highlight the robes, I copied in the bowl back from the original monk picture and colorized it as well with blue and green.

- 1: source 1
step 16 of 17
Cast a shadow onto the robe from the head. Used the brush and burn tools.

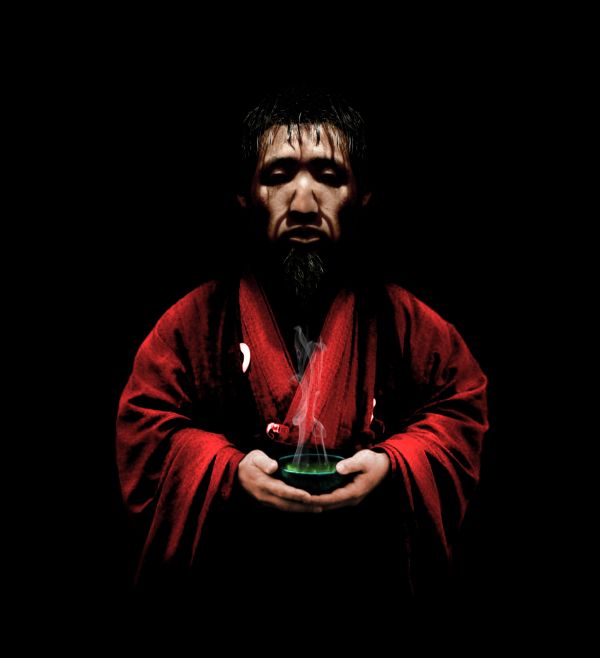
step 17 of 17
Finally, using some awesome smoke brushes from the below link, I added a bit of steam to the tea bowl and warped it to give it a bit of a "rise." In the final product, you'll notice that I also erased a couple of the swirls.

Final result
Pxleyes
Photography and photoshop contests
We are a community of people with
a passion for photography, graphics and art in general.
Every day new photoshop
and photography contests are posted to compete in. We also have one weekly drawing contest
and one weekly 3D contest!
Participation is 100% free!
Just
register and get
started!
Good luck!
Follow us:


© 2015 Pxleyes.com. All rights reserved.