
Original image
step 1 of 9
Simple cleanup of edge in the original also cut the face out and set it aside for later.

step 2 of 9
Took the green edge and distorted it to be more of an arch.

step 3 of 9
Copied piece and flipped it tweaked them a little and gentle erased the overlay to have them blend.

step 4 of 9
Copied the arch and set behind and distorted to add size and depth to arch. Repeated a few times.

step 5 of 9
Took original arch and distorted and flipped it to use as background piece and repeated it a few times and set on top of each other.

step 6 of 9
Introduce the original clock face behind the other pieces and adjust and trim as needed to fit and look right

step 7 of 9
Softened and darkened the face to fit into being in a covered situation. Then added the face shading, using different grays painted on in Multi mode and blurred to soften them

step 8 of 9
Here added the background started with flat black and then used Starbrushes from keren-r at Deviantart.com

step 9 of 9
Finally added some dark soft lines to the outer steps for more depth, added darker face to arch and then added a highlite layer over that and softened it. and last made the reflected lite on glass face of clock.

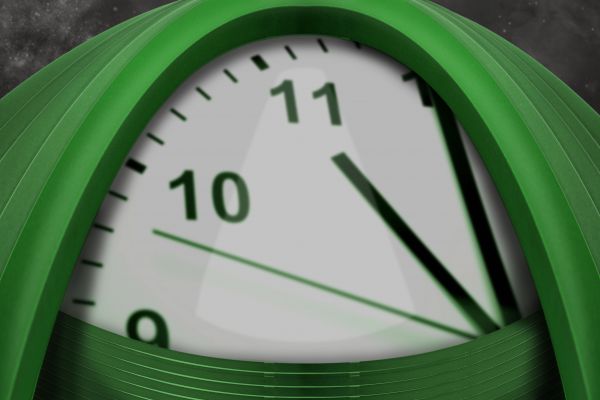
Final result
Pxleyes
Photography and photoshop contests
We are a community of people with
a passion for photography, graphics and art in general.
Every day new photoshop
and photography contests are posted to compete in. We also have one weekly drawing contest
and one weekly 3D contest!
Participation is 100% free!
Just
register and get
started!
Good luck!
Follow us:


© 2015 Pxleyes.com. All rights reserved.