
Original image
step 1 of 8
Using the pen tool the stock images were masked out, re-sized and placed into position.

step 2 of 8
The first sky image was placed in the background.

step 3 of 8
I added shadows udner the objects and a curves adjustment on the mountain. The sky wasn;t quite as dramatic as i wanted it to be, and so i used a second sky image and overlayed it on top, then applied a levels adjustment.

step 4 of 8
More work on the shading of the model. The wing was cut out and placed onto the model. It was a bit too short and chubby for the sleek creature i was trying to create, so i warped and liquified the wings to get a better shape.

step 5 of 8
Adjustments (levels, curves) applied to the wings, and a new layer with some white lighting.

step 6 of 8
Light rays added using my normal method:
New layer with a black and white "clouds filter" applied to it, i then used "Threshold" to which i then applied a heavy zoom blur filter to it. The light was then masked and set to "Overlay"
New layer with a black and white "clouds filter" applied to it, i then used "Threshold" to which i then applied a heavy zoom blur filter to it. The light was then masked and set to "Overlay"

step 7 of 8
To make sure all the colours matched, and also to create a nice mood, I applied all the following adjustment layers with varying blend modes and opacitites

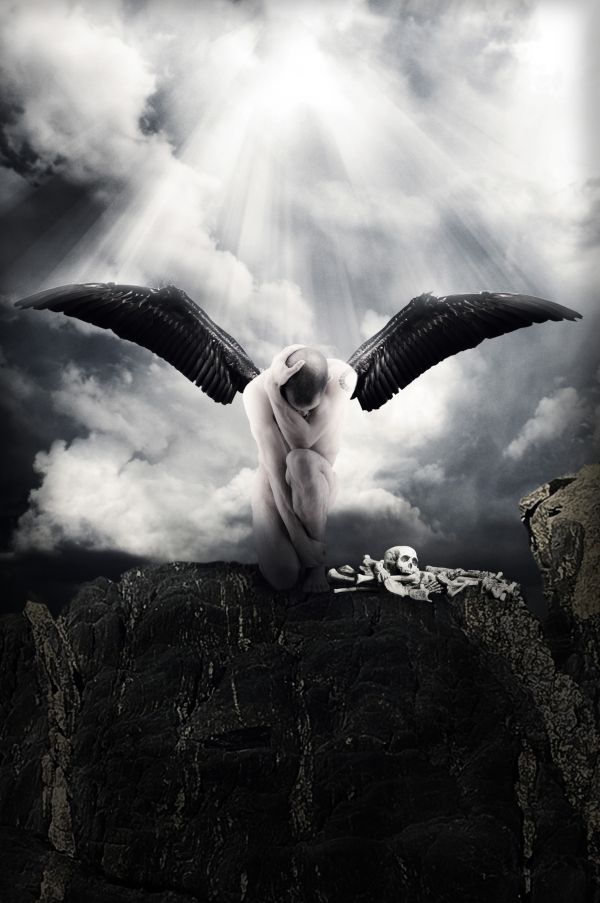
step 8 of 8
This is the result of the colour adjustments.

Final result
Pxleyes
Photography and photoshop contests
We are a community of people with
a passion for photography, graphics and art in general.
Every day new photoshop
and photography contests are posted to compete in. We also have one weekly drawing contest
and one weekly 3D contest!
Participation is 100% free!
Just
register and get
started!
Good luck!
Follow us:


© 2015 Pxleyes.com. All rights reserved.