
Original image
step 1 of 14
To begin background, the chandelier is scaled and stretched after chopping. Panels will be put side by side for background.

step 2 of 14
Here strips of stretched chandelier are placed side-by-side (every other one is also flipped horizontally) then all are merged into a single layer.

step 3 of 14
The chandelier has been chopped and duplicated, then sized to hang from top. Later, I decided not to use the chandeliers from the top, just as the container for the flowers. But I leave them here to show how changes are often made.

step 4 of 14
The chandelier is duplicated for the container. I flipped it over (edit/transform/flip vertically) and will change color with the hue/saturation tool.

step 5 of 14
Flowers were now formed from the glass of the chandelier with the liquify tool. Edges will be trimmed with eraser and smudge tools.

step 6 of 14
Here the sunflower is being made from liquified shape, brush tools being used to form brown center of flower.

step 7 of 14
Here more work is being done to flowers, shaping the petals with smudge too, and shading with dodge and burn tools.

step 8 of 14
Sunflowers are being duplicated, rotated and placed in a possible design. They are also scaled to slightly different sizes, and a couple are distorted with edit/transform/distort tool to change their shape somewhat.

step 9 of 14
More flowers have been placed around and behind sunflowers; a gradient background is brought in over the background design (about 80% opacity)

step 10 of 14
The canvas has been sized larger here to allow for a little more height to arrangement, and more flowers have been added.

step 11 of 14
Lamps have been removed from overhead. Leaves and stems have been drawn with brush tools. Veins are drawn using the burn tool with very small point and medium opacity.

step 12 of 14
After removing lamps at top, there seemed to still be something in the top corners, so I lassoed out design in chandelier source and fit it into one corner, using distort and scale tools, then chopped it on the curve. This shape is then duplicated (alt key), flipped horizontally, and placed in the other corner. The crystallization filter was used, then hue/saturation tool to get desired color.

step 13 of 14
Other corner is done here, and final shadows added throughout the design.

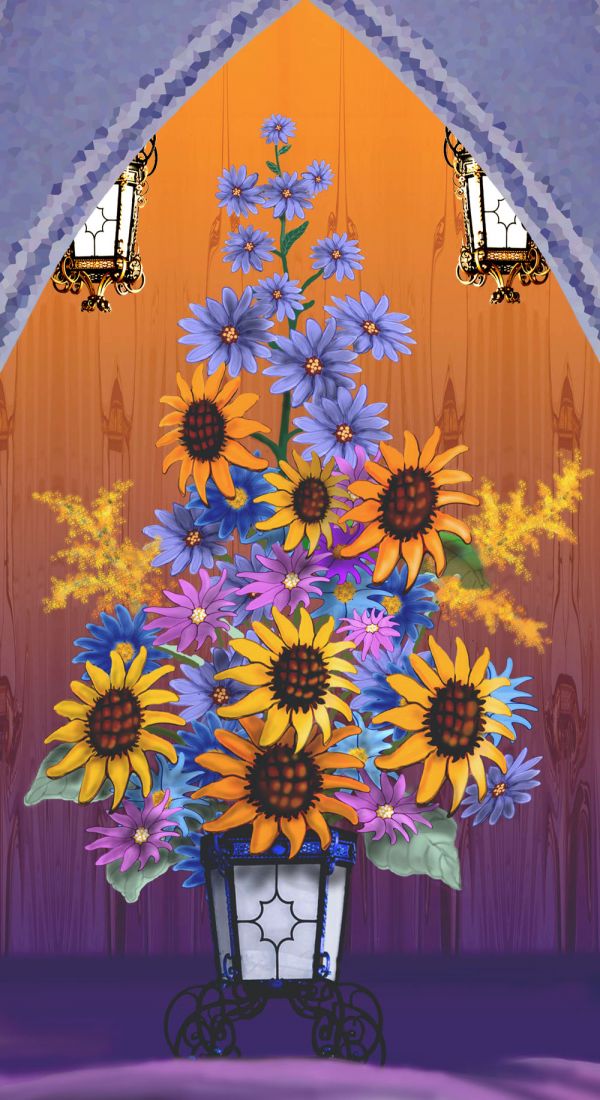
step 14 of 14
Finally -- I decided to put the lamps back in, but put them in to look like they are behind the corner pieces, giving a kind of backlight to the arrangement. Also, I added a warm filter to soften the whole work a little. Still wanted nice contrasting colors,

Final result
Pxleyes
Photography and photoshop contests
We are a community of people with
a passion for photography, graphics and art in general.
Every day new photoshop
and photography contests are posted to compete in. We also have one weekly drawing contest
and one weekly 3D contest!
Participation is 100% free!
Just
register and get
started!
Good luck!
Follow us:


© 2015 Pxleyes.com. All rights reserved.