
Original image
step 1 of 13
First I masked out the source image, duplicated it and applied the mask. Then I got rid of the elements I didn't want, using spot healing brush and clone stamp.

step 2 of 13
I wrote the words and applied layer style.

step 3 of 13
One at a time, I selected the words, contracted the selection and on a new layer I applied rust. PDS was saved to be used later.

step 4 of 13
A PDS for the masked-out vampire was created and saved too.

step 5 of 13
The same for the bat.

step 6 of 13
Now the blood bag. I adjusted its brightness/contrast and masked it out.

step 7 of 13
I got rid of the text I didn't want and wrote the currency symbol, applying layer style and distorting it a little. Saved the PDS to use it later.

step 8 of 13
I opened the background image - the castle door provided by Cornelia - and masked its inner wall.

step 9 of 13
A new inner wall was placed.

step 10 of 13
All PDS files I had saved were placed on their own layers.

step 11 of 13
I then worked on each element one at a time, creating layers below and above it for shadows and/or reflections.

step 12 of 13
Adjustment layers and burn and dodge tools were used too.

step 13 of 13
Finally all the layers were merged at the top and a copy was made. I applied gaussian blur and overlay blending with 10% opacity to the copy.

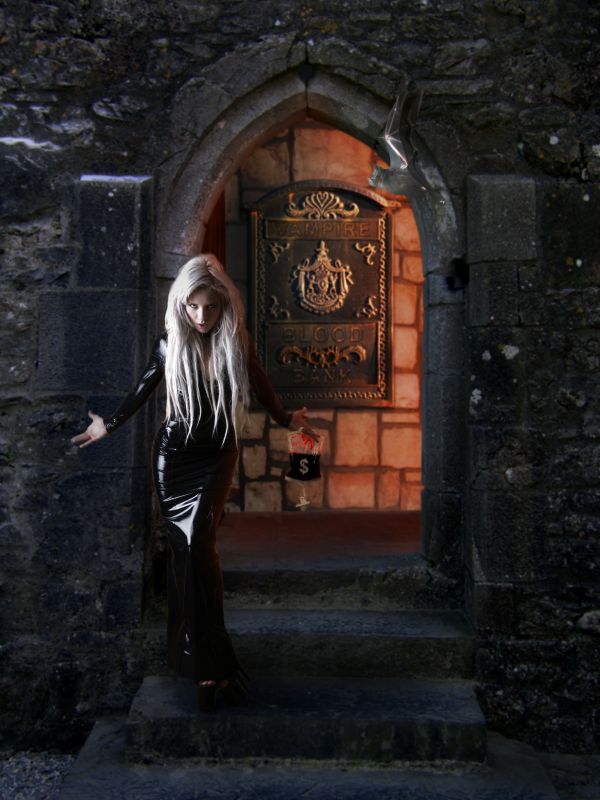
Final result
Pxleyes
Photography and photoshop contests
We are a community of people with
a passion for photography, graphics and art in general.
Every day new photoshop
and photography contests are posted to compete in. We also have one weekly drawing contest
and one weekly 3D contest!
Participation is 100% free!
Just
register and get
started!
Good luck!
Follow us:


© 2015 Pxleyes.com. All rights reserved.