
Original image
step 1 of 6
The first thing I did to create this was to select out the signs in the source photo.

step 2 of 6
I then open up the traffic signs photo that I got from sxc.hu that I thought would make a good backdrop for the finished piece. Ofcourse, it is too bright to be used as a background so take your curves adjustment layer and adjust it so that it appears somewhat like the right hand side of the example.

step 3 of 6
Now is the time to get creative with the signs that you selected out of the source image. Copy them over to your traffic signs document. I changed colors, adjusted sizes, shapes to get just what I wanted for the signs I was going to use. Typing in the words and beveling to make them appear to be embossed into the metal. Then bevel the sign itself to give it a bit of dimension.

step 4 of 6
I arranged the signs in random positions, using the perspective transform tool so they would appear to really be connected to the posts I created. Add a drop shadow keeping in mind to turn off global light so that you can position the shadow in the best spot considering the perspective.

step 5 of 6
The posts are just a rectangular shape pulled out long and thin. I chose to use gradient overlay with gold gradient in the fx menu. That allowed me to get the gradient just the right size for the pole. I then added a layer above and applied a grunge rough type brush to add the rusty finish. Using multiply as the blend mode. Clip this layer to your pole layer by positioning your cursor between the 2 layers while pressing the option button until the clip icon appears. This keeps your brush strokes on the pole and nowhere else. Combine all pole layers in to one real layer before you try to reposition to keep your gradient from being altered.

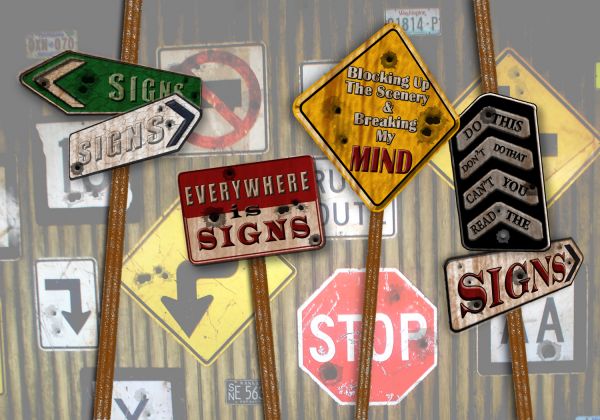
step 6 of 6
The other signs are made in the same manner. I used preset shape for the diamond shaped sign. The others are all versions of altered source signs. When all of the signs are done to your satisfaction, it is time to age them by using a variety of brushes. You will apply these the same as you did on the poles. I used different ones on all of them, including some bullet holes that I experimented with creating. Put your own finishing touches on it and you are done. Finished piece below

Final result
Pxleyes
Photography and photoshop contests
We are a community of people with
a passion for photography, graphics and art in general.
Every day new photoshop
and photography contests are posted to compete in. We also have one weekly drawing contest
and one weekly 3D contest!
Participation is 100% free!
Just
register and get
started!
Good luck!
Follow us:


© 2015 Pxleyes.com. All rights reserved.