
Original image
step 1 of 10
Selected part of the image and used spherize filter.

step 2 of 10
Cut out the spherized section into a new layer.

step 3 of 10
Cut part of the image and used liquify to create the open bud.

step 4 of 10
Cut another part to create the stems. Liquify.

step 5 of 10
Cut lady beetle in a new layer. Then selected the wings and copy pasted them in new layers. Free transform to make them open.

step 6 of 10
Dodge and burn on the beetle's body.

step 7 of 10
Re-sized the balls and put layer properties with inner glow. Dodge and burn.
Pasted the beetle in new layer with outer glow (orange colour) properties to screen. Duplicated beetle layer many times but without merging the layers.
Pasted the beetle in new layer with outer glow (orange colour) properties to screen. Duplicated beetle layer many times but without merging the layers.

step 8 of 10
Liquify for the trees and smudge. New layer with colour properties and brush tool to add colour to the trees.

step 9 of 10
Difference clouds for the background. Created waves in new layer (difference clouds, then motion blur, then chrome).

step 10 of 10
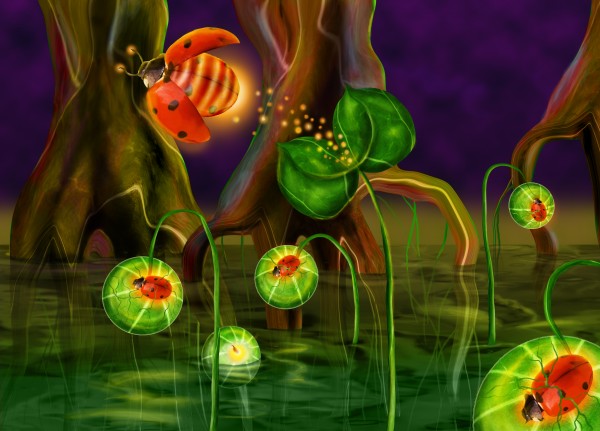
Gausian blur for the background. Copied the waves in new layer in front of the trees, opacity to 85%. Gradient with mask to give colour. Erased part of the waves for the part of trees and stems that are out of the water. Final touch the reflections and beetle glow in new layer.

Final result
Pxleyes
Photography and photoshop contests
We are a community of people with
a passion for photography, graphics and art in general.
Every day new photoshop
and photography contests are posted to compete in. We also have one weekly drawing contest
and one weekly 3D contest!
Participation is 100% free!
Just
register and get
started!
Good luck!
Follow us:


© 2015 Pxleyes.com. All rights reserved.