
Original image
step 1 of 8
This image will be the background. Close cut face with pen tool.

- : source
step 2 of 8
Add source image in separate layer above face image.

step 3 of 8
Reduce opacity on source image and cut out face shape with pen tool

step 4 of 8
Bring opacity back to 100% when you have cut out source. It will look like this.

step 5 of 8
Use Liner burn in layer options and reduce opacity to 55%.
It should look like this.
It should look like this.

step 6 of 8
In a separate layer add grey color and place at bottom of the other two layers.

step 7 of 8
This is what you should have.

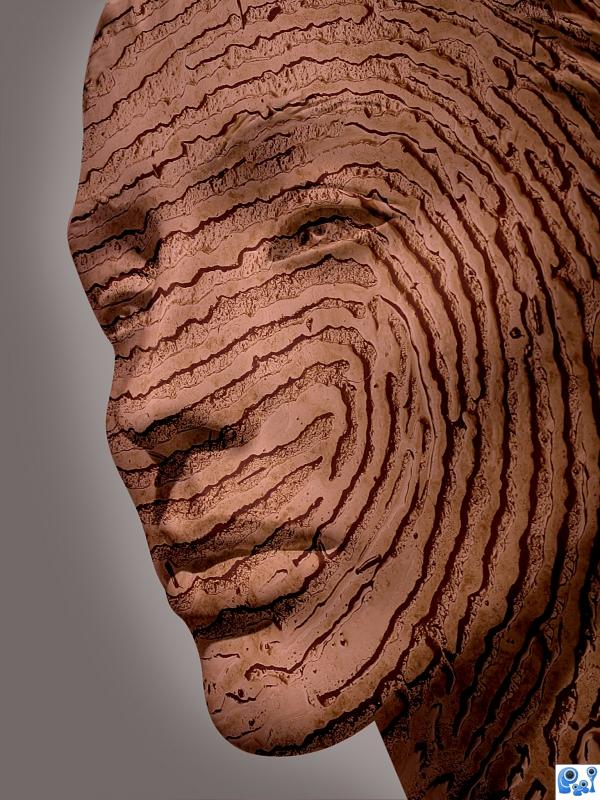
step 8 of 8
In the Grey layer add a layer mask and remove color (grey) at 50% to give a little halo.
That is it.
That is it.

Final result
Comments
Pxleyes
Photography and photoshop contests
We are a community of people with
a passion for photography, graphics and art in general.
Every day new photoshop
and photography contests are posted to compete in. We also have one weekly drawing contest
and one weekly 3D contest!
Participation is 100% free!
Just
register and get
started!
Good luck!
Follow us:


© 2015 Pxleyes.com. All rights reserved.
This is a great tutorial, and you wrote it so that everyone would be able to do something similar.
(5 years and 3866 days ago)