
Original image
step 1 of 9
This first stage shows the basic shapes I first pulled from the source. These are the basis of the whole bird, excluding the body.

step 2 of 9
This step shows what will become the main building parts of the wings, tail feathers and head decoration, a set of 3 fanned extrudes of a flame

step 3 of 9
A lot of duplicating, warping and rotating later the follow was achieved.

step 4 of 9
To bulk and decorate the wings and tail I thought a red undercoat would look nice. Duplicates of the top layer, turned red with hue/saturation and then rotated and warped slightly to achieve the look desired.

step 5 of 9
Hopefully not too hard to see in this SBS in the bottom right corner is the basis used for the body. This is the full source manipulated in liquify [sucked in and twirled.] Then duplicated 3 times, each one given a different hue and rotated to form a circle and then deformed to form a scale shape. I used this object to create the body using duplication, rotation, etc

step 6 of 9
This is the form of the head, a bunch of single flames make up the "scales" of the Phoenix and small flickers of flame make up the edging

step 7 of 9
Added a bunch of details, the eye is 2 layers both with layer styles. The mouth is 3 deformed flames to create the shape and then one flame for the tongue and some colour within for structure.

step 8 of 9
Detailing with dodge and burn tools. using the lens flare which I created on the wing-tip at this point as the main light source.

step 9 of 9
From Apophysis I took a fractal which suited, this was duplicated 4 times to fill the edges and a huge one in the middle to cover the gaps between them. Then I used "colour dodge" on the layers and on the black background underneath used a soft grey to highlight the areas I wanted the fractals to appear and removed using black where I did not wish to see any.
This is the end of my SBS, I may make a more detailed one in the future with more screenshots, etc depending on reactions.
This is the end of my SBS, I may make a more detailed one in the future with more screenshots, etc depending on reactions.

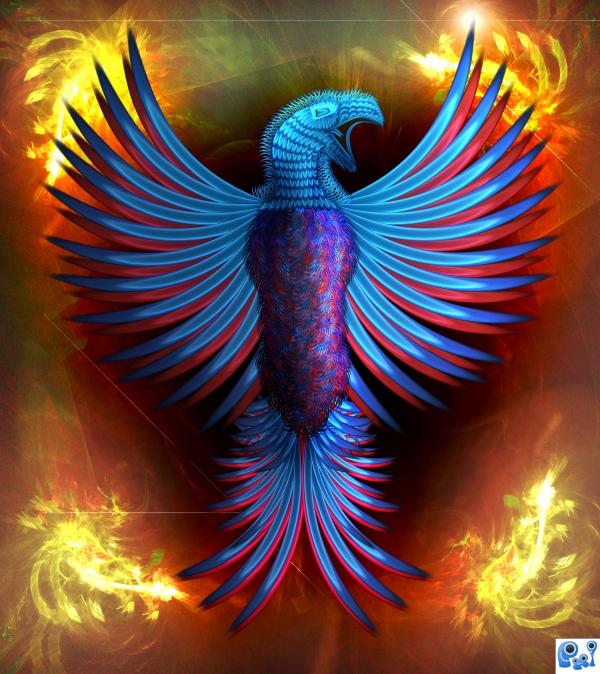
Final result
Pxleyes
Photography and photoshop contests
We are a community of people with
a passion for photography, graphics and art in general.
Every day new photoshop
and photography contests are posted to compete in. We also have one weekly drawing contest
and one weekly 3D contest!
Participation is 100% free!
Just
register and get
started!
Good luck!
Follow us:


© 2015 Pxleyes.com. All rights reserved.