
Original image
step 1 of 10
Cut out the image and placed on a black background.

step 2 of 10
Started putting in flames. Basic shape is white, warped, distorted, vertical blur and smudged, with inner and outer glow to add colour.

step 3 of 10
More flames added in the same way. I have added a layer mask and drawn some rough small curved lines.

step 4 of 10
Added vertical motion blur to the layer mask to give flame effect detail in the middle of the fire.

step 5 of 10
On a separate document, fill with black, add lots of noise and spherize. Transform/Warp to give shape shown.

step 6 of 10
Cut out the shape suggested by spherize filter and paint black for shading, eyes nose and mouth.

step 7 of 10
Add vertical motion blur to face, bring into main image. In blending options move black slider in on "This Layer" to fade out black areas.

step 8 of 10
Add contrast to face. bring in a bit more of the original background and add a warm colour. Darken down stones and area around fire.

step 9 of 10
Stretched the width of the background to help with composition. Created a new layer just below the flames. Filled with black, added noise, used blending options to knock out black areas. Applied radial blur at max and colourized to give red radial lines.

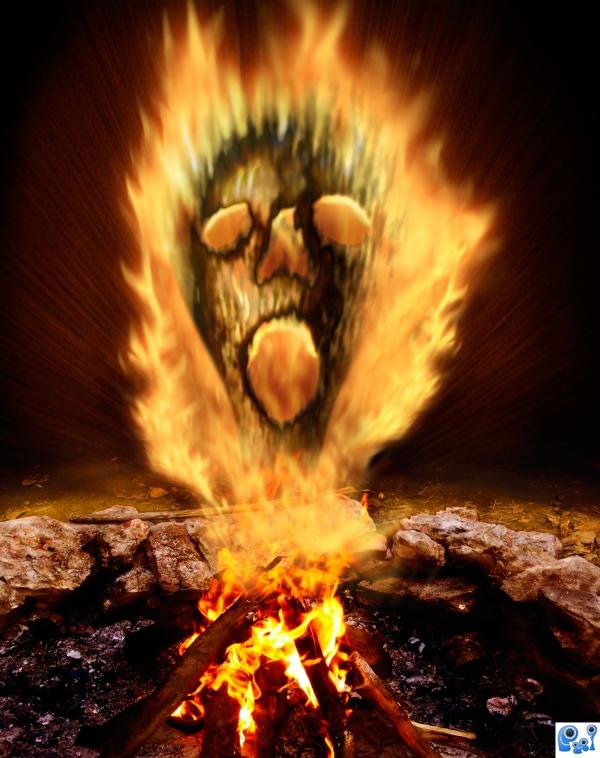
step 10 of 10
Flattened image. used dodge and burn to add further shadows to face and highlight areas at top of eyes and mouth.

Final result
Pxleyes
Photography and photoshop contests
We are a community of people with
a passion for photography, graphics and art in general.
Every day new photoshop
and photography contests are posted to compete in. We also have one weekly drawing contest
and one weekly 3D contest!
Participation is 100% free!
Just
register and get
started!
Good luck!
Follow us:


© 2015 Pxleyes.com. All rights reserved.