
Original image
step 1 of 8
Started with the Mona Lisa. Made it a little less saturated and additionally added a light blue filter.
The source is from Wikipedia. Picture is in the public domain and 2D art is in general free and not protected. At least not were I live.
The source is from Wikipedia. Picture is in the public domain and 2D art is in general free and not protected. At least not were I live.

- : source
step 2 of 8
Added the texture from the contest and set blending to overlay.

step 3 of 8
Created a channel from the texture image and used that as a selection over a layer. Jumped the tiles into a new layer from the original Mona Lisa image.

step 4 of 8
Increased the size of the canvas and created a marble like wallpaper with the clouds filter and a blend of some texture. The color is made with colorize in Hue/Saturation.

step 5 of 8
Increased the size of the canvas once more but this time only to the bottom. There a lot of wood texture tutorial in the Internet and I have some created earlier so I skip this step. From one these textures I've cropped some planks and made a floor. Used the 3D layer for the perspective.
Added also a darker board along the wall. It makes the transition more real.
Created some sort of a light fixture from scratch and placed that on top of the picture. Also added a shadow to the painting.
First clipped and then erased one of the tiles in the frame. Placed the clipped tile on the floor and used transform for perspective. It is also rotated.

step 6 of 8
Copy merged the whole image in a new layer and made this Smart Object. Added Lighting Effects and tweaked until it all looks like the light is coming from the fixture.
Took down the opacity of this layer to about 60%.
Took down the opacity of this layer to about 60%.

step 7 of 8
Added a curves adjustment layer and a vibrance layer to make the whole image shine.

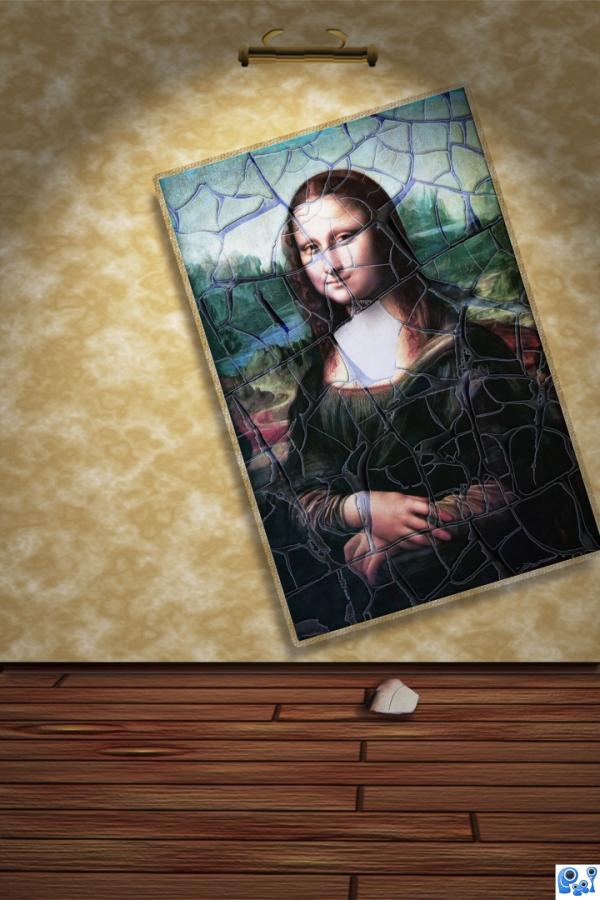
step 8 of 8
At first I thought I'm done but the more I looked at the image I thought something is missing. So I went back a couple steps and selected all layers with the painting.
Used transform and marked the center somewhere in the top right corner and then turned the painting. Also moved the tile to the right.
As you can see in the final image I went for the portrait format and centered for the fixture and not the painting. I also went back to the layer for the wooden floor and added some lighting texture to it.

Final result
Pxleyes
Photography and photoshop contests
We are a community of people with
a passion for photography, graphics and art in general.
Every day new photoshop
and photography contests are posted to compete in. We also have one weekly drawing contest
and one weekly 3D contest!
Participation is 100% free!
Just
register and get
started!
Good luck!
Follow us:


© 2015 Pxleyes.com. All rights reserved.