
Original image
step 1 of 9
An image of my dog I took a couple month ago. He was swimming in a pond and when he started shaking off the water I snapped away with my camera.

step 2 of 9
Created a channel from the contest image to have a selection

step 3 of 9
Placed the selection over the dog's contour and jumped this selection to a new layer.
Note: I forgot to take a snapshot here and I had to recreate this step and the next for this tutorial. So the lines are not at the same spot as in the final image; in case you were looking for clues where the tiles went.
Note: I forgot to take a snapshot here and I had to recreate this step and the next for this tutorial. So the lines are not at the same spot as in the final image; in case you were looking for clues where the tiles went.

step 4 of 9
Bloated this selection a little with Filter->Distort->Spherize

step 5 of 9
I tried various methods to move the tiles away from the center but finally had to select/move each every tile by hand.

step 6 of 9
Duplicated the final layer and with transform reduced the size to imaginary center of the image.

step 7 of 9
Added some Radial Blur with the zoom method to this layer. Duplicated this layer once more and set blending to Multiply making the motion blur stronger

step 8 of 9
On the top layer added some layer style with glow and emboss.

step 9 of 9
Almost finished. The final image will have some curves and vibrancy added.

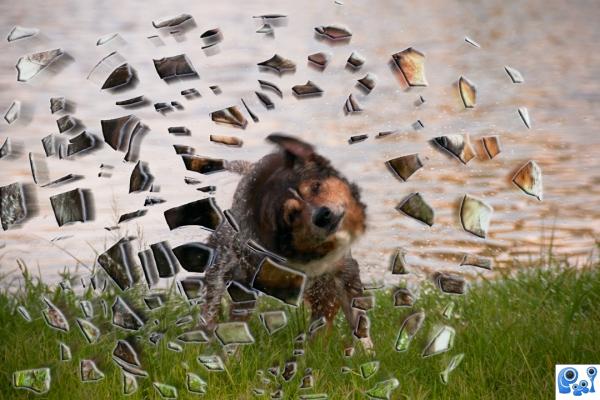
Final result
Pxleyes
Photography and photoshop contests
We are a community of people with
a passion for photography, graphics and art in general.
Every day new photoshop
and photography contests are posted to compete in. We also have one weekly drawing contest
and one weekly 3D contest!
Participation is 100% free!
Just
register and get
started!
Good luck!
Follow us:


© 2015 Pxleyes.com. All rights reserved.