
Original image
step 1 of 10
Removed the makeup on the source image.

step 2 of 10
The source was not big enough to cover my image with the desirred effect. So I simply duplicated and masked to blend in order to make it bigger.

step 3 of 10
Masked out the shape of the face and the eyes.

step 4 of 10
Applied a displacement map to the 'cracks' made from the original face image.
Changed the blend mode to multiply.
Changed the blend mode to multiply.

step 5 of 10
Enhanced the shadows and highlights.
Here you can see the before and after.
Here you can see the before and after.

step 6 of 10
Here you can see the effect of adding shadow and highlights.
Small image is before and large image is after.
Small image is before and large image is after.

step 7 of 10
Used the liquify tool to 'bloat' some of the parts of the face for a better 3d effect.

step 8 of 10
Here I sharpened the image. Firstly I did a bit of "Dodge'ing" on the eyes to make them stand out a bit more.
Secondly I duplicated the layer, rendered high-pass, changed the blending mode to hard light.
Gives the image a very sharp look.
Secondly I duplicated the layer, rendered high-pass, changed the blending mode to hard light.
Gives the image a very sharp look.

step 9 of 10
Adjusted curves to effect.

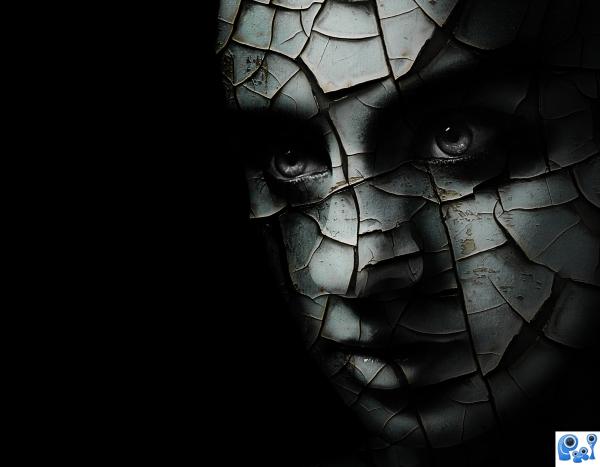
step 10 of 10
Used the liquify tool for the last time in order to make the pieces on the edge of the face look like they are sticking out.

Final result
Pxleyes
Photography and photoshop contests
We are a community of people with
a passion for photography, graphics and art in general.
Every day new photoshop
and photography contests are posted to compete in. We also have one weekly drawing contest
and one weekly 3D contest!
Participation is 100% free!
Just
register and get
started!
Good luck!
Follow us:


© 2015 Pxleyes.com. All rights reserved.