
Original image
step 1 of 10

step 2 of 10
Using the Quick Mask tool in PS, I carefully selected the statue and surrounding marble "frame" and inversed the selection to erase the part not needed. Then I transferred the image to the orginal source image.

step 3 of 10
Not wanting to keep the roses or vase, I erased them from the current image.

step 4 of 10
This step is where I began to fill in the missing parts of the statue and "frame" using the Stamp tool and Paint Brush with a little dodge and burn.

step 5 of 10
Isolating each part of the image was done by selecting the "frame" and the statue and dragging them to new canvases in order to complete the restoration of the image.

step 6 of 10
By selecting the "frame" with the Magic Wand and moving it to the original image, I was able to see the precise area I wanted to darken with the History tool (set on multiply). By working on the source layer that was below the "frame" layer I could see the depth necessary to cerate that niche look.

step 7 of 10
I applied a drop shadow to the statue BEFORE moving it (after selecting it with the Magic Wand) to the newly created archway in the niche. That enabled me to make sure the shadow was properly placed acording to the visible shadows on the statue itself. Then I copied and pasted the layer style to the archway layer to be sure the shadows were the same.

step 8 of 10
After burning the edges in step 7 (which I forgot to tell you!!) I thought I was almost done. Then I noticed that the archway was just sort of 'sticking' to the tree and I needed something that anchored it in place. So I made the cross-nails to cement it into the tree.
After combining the chosen shapes, I applied the Chrome filter, colored the center to give a bit of demention and nailed the archway to the tree!
After combining the chosen shapes, I applied the Chrome filter, colored the center to give a bit of demention and nailed the archway to the tree!

step 9 of 10
Again, I thought I was done! But wait...........The color of the bark needed some brightening which I did with the Paint Brush set on the color mode using a bright brown color picked up from the source image.
Then I decided that the block part of the statue needed to actually be part of the tree. So using the source image and selecting areas with the Rectangle tool, I fit them into place and turned the marble into wood and polished it with some white paint (at a low opacity) to give it that smooth,shiney look.
Then I decided that the block part of the statue needed to actually be part of the tree. So using the source image and selecting areas with the Rectangle tool, I fit them into place and turned the marble into wood and polished it with some white paint (at a low opacity) to give it that smooth,shiney look.

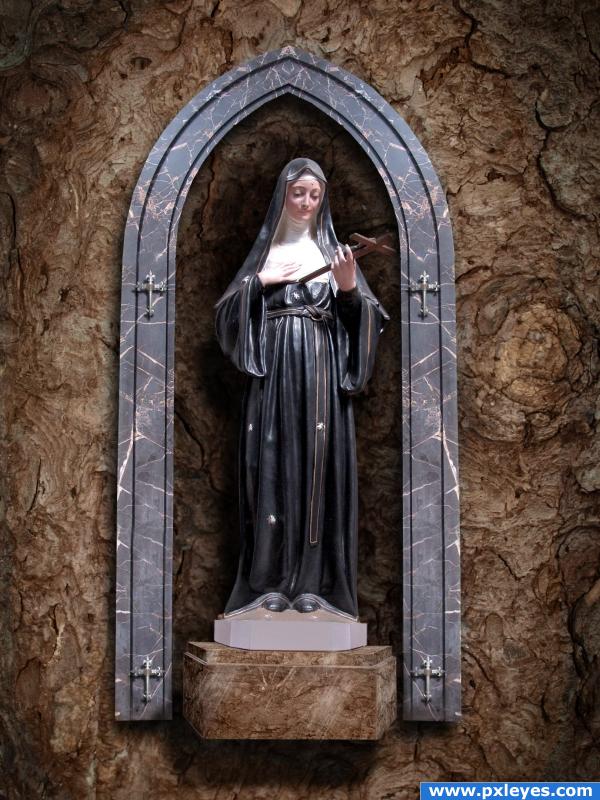
step 10 of 10
And this is the final image.

Final result
Pxleyes
Photography and photoshop contests
We are a community of people with
a passion for photography, graphics and art in general.
Every day new photoshop
and photography contests are posted to compete in. We also have one weekly drawing contest
and one weekly 3D contest!
Participation is 100% free!
Just
register and get
started!
Good luck!
Follow us:


© 2015 Pxleyes.com. All rights reserved.