
Original image
step 1 of 19
I cut the fish out using the Polygonal Lasso Tool, made it smaller - about 1/8 of its original size -, and got it straight up.

step 2 of 19
I created a folder for my first flower, duplicated the cutout of the fish and put that layer into the folder. Then I duplicated that layer seven times, turning round the first copy 45°, the second 90° and so on (45° X 8 = 360°).

step 3 of 19
I applied drop shadow, inner shadow, inner glow and colour overlay to one of the copies, and pasted the same layer style to the other copies.

step 4 of 19
On a new layer on the top of the copies and using Eliptical Marquee Tool I drew a circle in the centre of the wannabe flower.

step 5 of 19
Time for Layer Style: drop shadow, inner shadow, inner glow and pattern overlay (check out the link)

step 6 of 19
On a new topmost layer I created a path and having 'simulate pressure' checked I applied a stroke using a large hard default brush. My stulised leaf was ready.

step 7 of 19
Layer Style was applied on the leaf: drop shadow and inner glow.

step 8 of 19
I duplicated the layer where the leaf was and dragged it to the bottom; changed it using transformation controls and ward modes, and changed colours in the Layer Style slightly.

step 9 of 19
The process for the stem was the same: path and stroke with 'simulate pressure' still checked. Just changed the size of the brush and applied only inner glow.

step 10 of 19
Having got the first flower finished, all I had to do was to duplicate the folder five times and work on the copies, changing sinze and position and some things in the leaves and stems.

step 11 of 19
To draw the grass, first I had to create a brush using the same process I used to creat the leaves, but coloring it black and defining it brush preset.

step 12 of 19

step 13 of 19

step 14 of 19
Having got my personal brush ready, I created a folder for the grass and a layer into it. I adjusted shape dynamics and scattering, applied layer style with only colour overlay, and drew the first line of grass.

step 15 of 19
I used the same process for the second and third lines of grass, changing the size of the brush and colour overlay.

step 16 of 19
I created a new layer at the bottom and filled it a light colour.

step 17 of 19
On a new layer above the last one, I drew a rainbow using a default gradient named Russel's Rainbow, applied gaussian blur and 35% opacity.

step 18 of 19
I created a new layer above the rainbow and using a default brush named 'fuzzbal' after adjusting its presets I scattered some dandelion seeds.

step 19 of 19
Finally the layer style: zero fill opacity and outer glow.

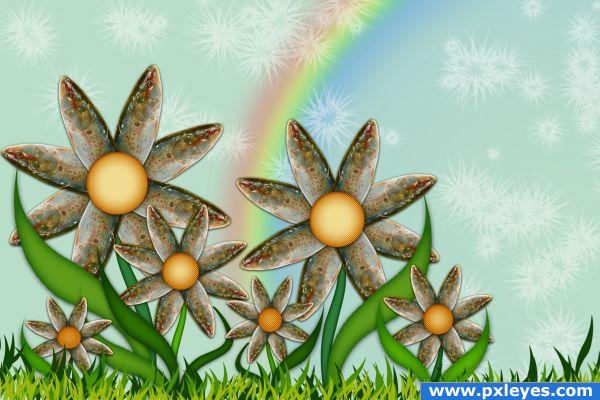
Final result
Pxleyes
Photography and photoshop contests
We are a community of people with
a passion for photography, graphics and art in general.
Every day new photoshop
and photography contests are posted to compete in. We also have one weekly drawing contest
and one weekly 3D contest!
Participation is 100% free!
Just
register and get
started!
Good luck!
Follow us:


© 2015 Pxleyes.com. All rights reserved.