
Original image
step 1 of 15
1.Make Black Fill Layer After BG Layer. Extract the plugs from the original picture ( I used pen tool, to extract it. You can used other tool such as applying filter extract and clean up the picture, or maybe you can used eraser tool )

step 2 of 15
2. Copy the Plug Layer and hide it ( click at the eye mark in the left side layer ). Goes to Plugs Copy Layer, apply Filter – Stylize – Find Edges.

step 3 of 15
3. Go to the Channel Tab, press hold Ctrl and Click at RGB Channel. Press delete to erase the white color. Back to the Layer and press ctrl+D to deselect it. See that only the grey color left on the picture.

step 4 of 15
4. Press hold Ctrl click at Plugs Copy Layer, and then set the foreground into blue color ( R=0 , G=81, B=254). With brush tool (hardness 100 %), colorize the layer, and after that press ctrl+D to deselect it. ( don’t forget to save your work first )

step 5 of 15
5. Duplicate Plug Copy Layer, press Ctrl+T to rotate it using Free Transform Tool. Rotate Plug Copy 2 Layer 90 degree CW. After That duplicate Plug Copy 2 Layer ( it’ll automatically name Plug Copy 3 ) and rotate it Horizontal. You’ll see that the Plug Copy Layer (the first copy) is not in the right position, so you’ll have to move it till it center place.

step 6 of 15
6. Merge plug copy, plug copy2, and plug copy3 layer. In PS 3 we can easily merge layer by select the layer we want to merge by press hold Shift and press arrow button on keyboard to select which layer we want to merge. After that press hold Alt and click little triangle on right top panel group, and it’ll be a pop up window, (remember…still press hold Alt) select merge layer.

step 7 of 15
7. Make New Layer use blending mode Color, rename it “Colorâ€. With brush tool ( hardness 100 % ), color the plug as like as shown at the picture.

step 8 of 15
8. Apply drop shadow on Color Layer. Use setting as seen as the picture..

step 9 of 15
9. Make New White Fill Layer, set foreground and background into black and white ( press D ), apply Filter – Render – Clouds. Repeat this filter few times by pressing Ctrl+F. Then inverse the layer by press Ctrl-Shift-I. Change Blending Mode to Color Dodge, decrease layer opacity to 90%

step 10 of 15
10. Still in Clouds Layer, press hold Ctrl and click at Plug Merged Layer. After that, add layer Mask ( the place at left bottom panel ) and you’ll see that masking automatically applied.

step 11 of 15
11. Open Baby Smile Picture, and place it after the Clouds Layer. Use free transform to place it where we want to. (Tips: decrease the opacity layer and transform the picture to where we want to). After that change the blending mode to Luminosity. Apply masking all around except the Eyes.

- : source
step 12 of 15
12. Use Born Tool to add more shadow to the eyes ( setting: Range: Midtones, Exposure: 50%, brush hardness: 50% )

step 13 of 15
13. Open Hands Under Light Picture, divide the left and the right hand using Rectangular Marquee Tool. With Move Tool, drag the Left and The Right Hand and place it after Baby Smile Layer.

- 1: source 1
step 14 of 15
14. Rotate the Hand using free transform tool.

step 15 of 15
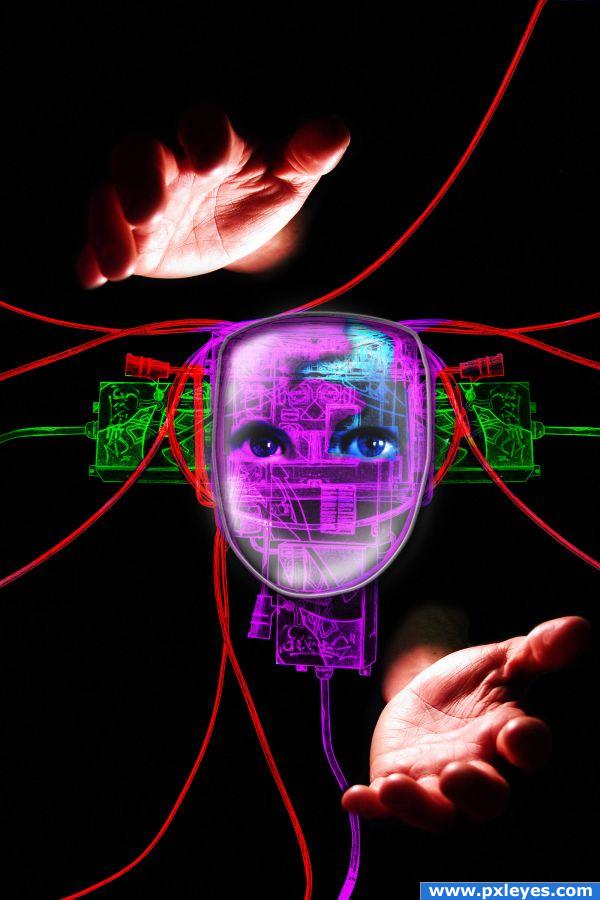
15. Apply Masking on both Hand…and there….it’s done !!! ^___^

Final result
Pxleyes
Photography and photoshop contests
We are a community of people with
a passion for photography, graphics and art in general.
Every day new photoshop
and photography contests are posted to compete in. We also have one weekly drawing contest
and one weekly 3D contest!
Participation is 100% free!
Just
register and get
started!
Good luck!
Follow us:


© 2015 Pxleyes.com. All rights reserved.