
Original image
step 1 of 8
First, I cropped the finger to just below the first knuckle.

step 2 of 8
Then I found this image of a bowling pin. Here's the link:
http://www.donerite.com/global_images/amf_used_notcoated640.jpg
http://www.donerite.com/global_images/amf_used_notcoated640.jpg

step 3 of 8
Then, using liquefy and the pin pic to match the shape, I created the finger pin. I used the magic eraser tool to remove parts of the pin photo to easily get a mask for the stripes and AMF logo on the pin then dragged the mask to match the finger pin. Then using contrast, I changed the shade on the finger pin.

step 4 of 8
For the next step, I found this image for the background. Here is where I found it:
http://visualparadox.com/images/no-linking-allowed-main/bowling.jpg
http://visualparadox.com/images/no-linking-allowed-main/bowling.jpg

step 5 of 8
Using the created finger pin, I dragged it over to the background image, resizing it to fit each pin, one layer for each pin. This shows only two layers but you get the idea.

step 6 of 8
After adding all the pins, I adjusted each with brightness/contrast to match the lighting effect to give it more realism. I also burned each just a bit to give it more dimension, as well as blurring edges to smooth out some of the rough edges.

step 7 of 8
To make the bowling ball with a finger groove look, I used the same process with liquefy that I used with the pin. I found a cartoon bowling ball to use as a pattern for the mask.

- : source
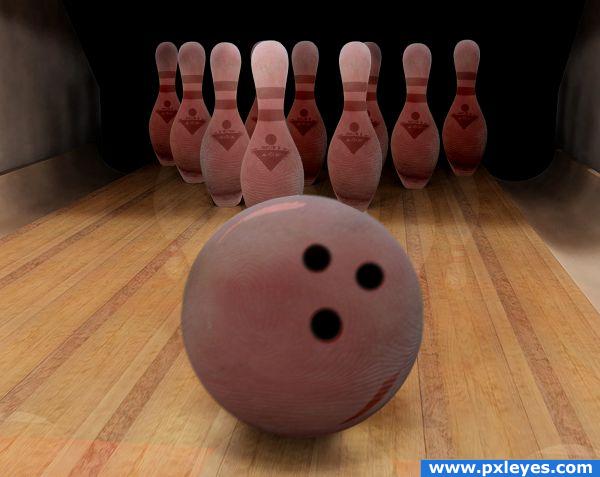
step 8 of 8
After using liquefy, I matched the shape of the finger with the shape of the ball. This is also another layer. I then matched the shadows and holes of the cartoon bowling ball and used the mask to adjust the shadows and make holes on the finger ball. This also includes a motion blur to give the ball motion, but I had to cut back, only because I didn't want to loose detail of the ridges in the finger, so I had to use my best judgment as far as how much motion to include. Then some final touch-ups on the pins with burn, blur and brightness/contrast.

Final result
Pxleyes
Photography and photoshop contests
We are a community of people with
a passion for photography, graphics and art in general.
Every day new photoshop
and photography contests are posted to compete in. We also have one weekly drawing contest
and one weekly 3D contest!
Participation is 100% free!
Just
register and get
started!
Good luck!
Follow us:


© 2015 Pxleyes.com. All rights reserved.