A Work in Progress: Flamed Skylane


This guide was made for entry:
Flamed Skylane
In Contest:
aeroplane


step 1 of 5

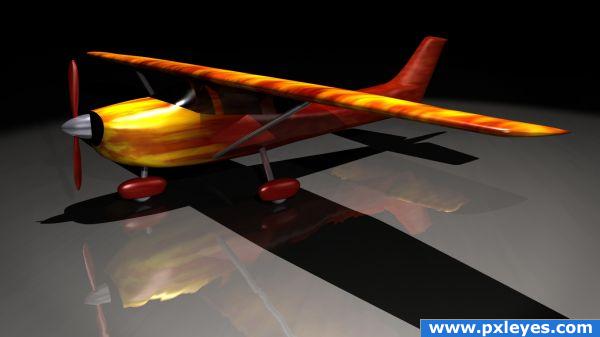
I assumed Spline Patching would be the most accurate technique for getting the shapes. I decided to use a Cessna for guidance from The-Blueprints.com, created by Richard Ferriere (see source link below).

I started creating the basic 4 curves around the body and then added the details with curves cutting through the plane at three places (along the Y-axis).

I then patched together the curves, section by section, with the result showing in the top right view.

Creation of Flamed Skylane: Step 1
sources used for this step:

step 2 of 5

I used the same techniques separately for the wings, based on the same blue prints (by Richard Ferriere). The result's showing in the top right view.

I gave all separate parts different surfaces and colors for easier selection and tweaking later on.

Creation of Flamed Skylane: Step 2
sources used for this step:

step 3 of 5

The wing support pipes is made by simple Discs, rotated and re-sized to match the blue prints (by Richard Ferriere, se source link below).

The landing gears are boxes, subdivided several times and adjusted point by point to match. The landing gears tires are Lathed rounded shapes, with the center beveled into rims (not very visible in the final entry).

The propeller cone is a Lathed curve, similar to the tires mentioned above. The propeller on the other hand is spline patched together and then lightly twisted to get the propellers characteristic shapes.


Creation of Flamed Skylane: Step 3
sources used for this step:

step 4 of 5

The body was textured to look like someone airbrushed flames. I did this by adding several yellow, red, orange and black Turbulence Procedurals to the color map. All with different starting positions and falloff to give the surface variations. I also added one light procedural for the Diffuse and Specularity map. The specularity was set high (75%) with a medium Glossiness to make it look more fiber plastic. It wouldn't be realistic with to much reflection on the body, so I set it low (10%). For variations I added a small Procedural to the Bump map (10%).

The surface I gave the body was copied and modified for the wings, propeller and landing gears air brushed surface.

The metal parts is simple gray, low diffuse (30%), medium reflecting surfaces to make it look slightly cromed.

Many of the 3D creators seems fond of (easily impressed?) by simple ray traced reflections. So I added a high reflection (65%) to the ground. I also added some procedurals (Turbulence x2 & Crumple) to the bump map to avoid making it look like a mirror.

The windows is non diffuse highly specular (90%), glossy (60%), reflective (75%). With light Procedural texturing on the Specular and Reflection maps.

Creation of Flamed Skylane: Step 4

step 5 of 5

The scene was then set up with three spotlights. The above one is the main light, with a 200% intensity. The one for the camera is set to 100% and the right one to 50%. All lights have Fall off, to exclude the surrounding basic walls and put the focus on the model instead.

The camera was then set up with medium Anti Aliasing, Adaptive Sampling and Final Gather for global illumination. The Box Reconstruction filter was used instead of the default one. Final rendering took about 4 hours.

Creation of Flamed Skylane: Step 5

Final result

Creation of Flamed Skylane: Final Result

LOGIN or REGISTER FOR FREE
to rate this guide and create your own guides.