
Original image
step 1 of 16
Create a 1x1 image. Use the pencil tool to make the pixels on the very edge of the image into a border 1 pixel thick. Define the image as a pattern.

step 2 of 16
Create a new image which is 20 inches by 20 inches. Use the paint bucket tool to fill it with the pattern. Use the spherize tool to make it go inwards. Duplicate the layer and merge them to make the lines stronger.

step 3 of 16
Hide the layers you just created. Without creating a new image, repeat step 2 except spherize outwards.

step 4 of 16
Repeat step 3 with the Distort > Polar Coordinates filter.

step 5 of 16
Reveal all the layers. This is what the compound grid you will be using in the image should look like. It will not be visible in the final image but it is useful as a reference to make sure everything looks how you want it to.

step 6 of 16
Paste the leaf image into its own document. Select a swatch from it. Paste that swatch into its own document four times. Put each copy of the swatch in one corner. Rotate the swatches so they all form the following:

step 7 of 16
Apply the Twirl filter and resize the document to 1 inch by 1 inch.

step 8 of 16
Repeat Steps 6 and 7 with another swatch.

step 9 of 16
Repeat step 8 with a third swatch.

step 10 of 16
Define each of the three swatches as patterns. Create a new layer on your grid image. Use the paint bucket tool with the first swatch selected as a pattern. Then spherize that layer outwards.

step 11 of 16
Hide that layer. Repeat step 10 with the second swatch except spherize inwards.

step 12 of 16
Repeat step 11 with the third swatch except use the polar coordinates filter.

step 13 of 16
Render Lighting using an omni light in the center of the swatch layer in step 12. Hide all the reference grid layers.

step 14 of 16
Reveal all three swatch layers and set them to the Soft Light blending option. Use the marquee tool to select a square from the original leaf image. Resize it to 20 inches by 20 inches and paste it as the bottom layer in your grid image.

step 15 of 16
Duplicate the bottom layer (leaf) and move the duplicate layer to the top. Set the blending on this layer to the Color blending option. Desaturate the bottom layer.

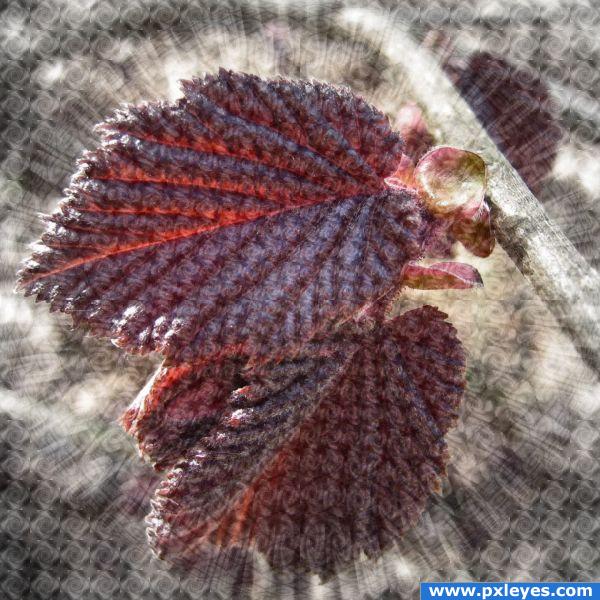
step 16 of 16
Select as much of the top layer with the marquee tool as you can without selecting the entire thing. Feather the selection as much as possible (250 pixels). Select the inverse. Fill the selection with white paint using the paint bucket tool.

Final result
Pxleyes
Photography and photoshop contests
We are a community of people with
a passion for photography, graphics and art in general.
Every day new photoshop
and photography contests are posted to compete in. We also have one weekly drawing contest
and one weekly 3D contest!
Participation is 100% free!
Just
register and get
started!
Good luck!
Follow us:


© 2015 Pxleyes.com. All rights reserved.