
Original image
step 1 of 5
First step was to create a duplicate layer of the original image. I flipped this layer using edit > transform > flip horizontal.

step 2 of 5
I applied a mask to the top layer, masking out the head and front legs.

step 3 of 5
There was some show through from the second layer, so I used the clone stamp in the marked area to hide some of the front legs and fill in some gaps of wool.

step 4 of 5
When I was happy with my masking, I applied cloning to random stones to break up any repeated patterns. Last of all I applied a photo filter adjustment layer to give the image some warmth.

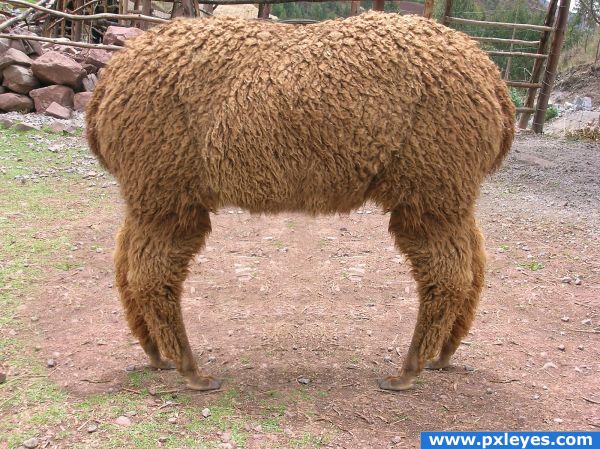
step 5 of 5
My first attempt at this image resulted in a 'mirrored' background effect so I had to solve the problem using my masks more effectively and trying a different technique. I am happy with the result.

Final result
Comments
Pxleyes
Photography and photoshop contests
We are a community of people with
a passion for photography, graphics and art in general.
Every day new photoshop
and photography contests are posted to compete in. We also have one weekly drawing contest
and one weekly 3D contest!
Participation is 100% free!
Just
register and get
started!
Good luck!
Follow us:


© 2015 Pxleyes.com. All rights reserved.
Woops! There's a shadow to the left that is out of place. I'll (try to find some time) to fix that and post an modified version. Thx all
(5 years and 3947 days ago)