
Original image
step 1 of 17
Copied background layer and ran Distort> Polar coordinates.

step 2 of 17
Again copy the background, but flip vertically then run distort> polar on this layer.

step 3 of 17
Copy background layer, run Distort>twirl at almost full range.

step 4 of 17
Copy background (4th copy so far) and run twirl but the opposite way. (One is clockwise, one counter clockwise)

step 5 of 17
Each of the previous layers have been set to overlay mode. Now they all get put into their own group. This group will eventually be in differance mode.

step 6 of 17
This shows the group as differance against the normal layer

step 7 of 17
This group gets copied 2 times. the bottom copy is differance, the middle one is hard mix and the top is overlay modes

step 8 of 17
The image is now quite dark so i iput a levels adjustment layer on the bottom layer to brighten it up.

step 9 of 17
Made the ghost. drew him, copied layer and blured the bottom. Took the skull from previous contest, added fire from an image I took. (ghost could be a tut on its own)

step 10 of 17
fire image used in ghost

step 11 of 17
Added lightening using a pattern I made. put the blue over instead of having white lines

step 12 of 17
Copied and Flattened the previsous group (lightening and color) and ran pinch on this layer. Both this flattened layer and the group are set at lighten mode at about 70% opacity.

step 13 of 17
To get more movement on the image, again copied the background and ran shear on it, just enough to 'lean' it a bit.

step 14 of 17
Showing the shear setting used

step 15 of 17
Flipped the sheared layer horizionally and set the bottom to normal and the top to overlay. At this point the original background layer is not showing.

step 16 of 17
Because the bottom of the image is too dark and has no detail, put a Brightness/Contrast adjustment layer on top of whole thing masked to show only on the bottom

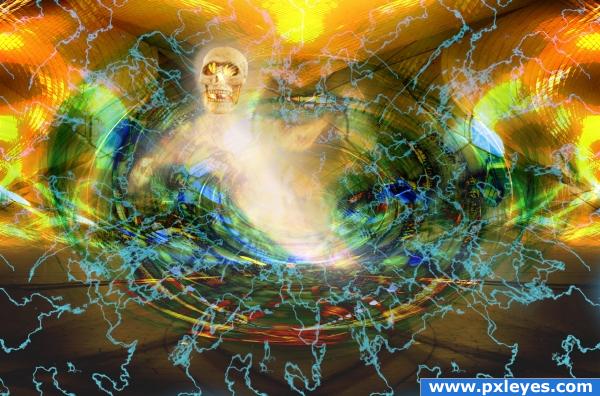
step 17 of 17
There was alot of moving layers around and adjusting modes before was totally happy with result. Enjoy!

Final result
Pxleyes
Photography and photoshop contests
We are a community of people with
a passion for photography, graphics and art in general.
Every day new photoshop
and photography contests are posted to compete in. We also have one weekly drawing contest
and one weekly 3D contest!
Participation is 100% free!
Just
register and get
started!
Good luck!
Follow us:


© 2015 Pxleyes.com. All rights reserved.