
Original image
step 1 of 11
First I masked off each side on separate layers.

step 2 of 11
Then using the pen tool, I made the profile for the right side. I, then, used the path to make a selection. I used that selection to make a "mask" which I then used . . .

step 3 of 11
. . . for the liquify filter. I used this on the layer that had the mask which revealed the right side of the image. This made it easier to "push around" the pixel on the right side of the image only.

step 4 of 11
This is the result with the left side of the image turned off.

step 5 of 11
I repeated the whole process for the left side of the image. I just needed to inverse the mask that I used for the liquify filter. This is the result so far. Additionally, since I had the right side of the image on top in the layer stack, I could be a work a little more quickly with the left side.

step 6 of 11
Now to start "carving out" the faces. I used a little burning and dodging and a LOT of layers of "fake" burnig and dodging for this. Almost each adjustment is on it's own layer. I chose a color from the original image with the eyedropper and brushed over the image where ever I needed to make an adjustment. If I wanted to "burn" it, I set the layer blend mode to multiply. If I want to "dodge" the area, I set the layer blend mode to screen. I've shown the gradual progression in five steps above, but I the psd actually had about twenty layers of adustments for the side. There was a lot of trial and error involved in this. A LOT.

step 7 of 11
Now, to start on the left side of the image. First of all, the "lips" were to high, so I hade to clone them to where I needed them to be.

step 8 of 11
Then I began the whole "burning and dodging" process all over again.

step 9 of 11
The "ear" on the right side of the image was bothering me. So, I had to clone it to a posistion that made more sense.

step 10 of 11
I needed to make some adjustment to the mouth on the left side so I used the clone tool for a little rock face cosmetic surgery.

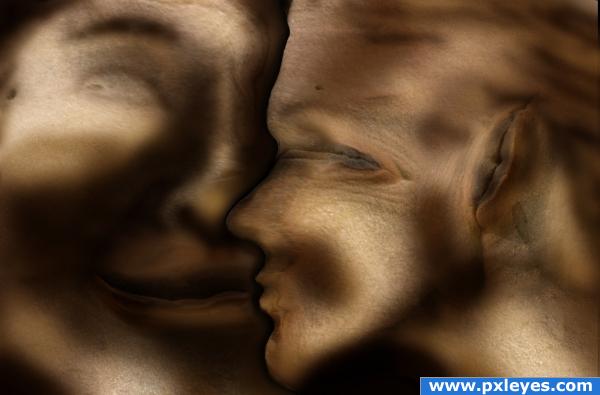
step 11 of 11
After more adjustment to the left face this is the results.

Final result
Pxleyes
Photography and photoshop contests
We are a community of people with
a passion for photography, graphics and art in general.
Every day new photoshop
and photography contests are posted to compete in. We also have one weekly drawing contest
and one weekly 3D contest!
Participation is 100% free!
Just
register and get
started!
Good luck!
Follow us:


© 2015 Pxleyes.com. All rights reserved.