
Original image
step 1 of 12
Selection of carrousel from source image using the pen tool.
1. - outside selection.
2. - got rid of the green backround visible through some areas in between bars. I used the pen tool on small areas and simply clicked del.
1. - outside selection.
2. - got rid of the green backround visible through some areas in between bars. I used the pen tool on small areas and simply clicked del.

step 2 of 12
I added first backround. Thanks to "Pyrator"on Flickr one more time for a great shot.
Blended roughly.
Blended roughly.

- : source
step 3 of 12
I added the same backround again, this time focusing on the top part which I wanted to be bigger.
Blended roughly the two layers.
Blended roughly the two layers.

- 1: source 1
step 4 of 12
I duplicated both layers and changed blending mode to multiply since I was looking for more darkness (the Christmas light were supposed to give a glow look to the whole image).

- 2: source 2
step 5 of 12

step 6 of 12

step 7 of 12
Added Christmas light from a free PNG file offered by Obsidiandawn. I had to manually match all pieces, as the initial piece from the PNG file was quite short. And this was good anyway...cause I also flipped them horizontal to get diversity in lights.
I also made them slightly more glowing (using screen blending mode and gaussian blur) but I'll return to that later on to make them even brighter.
I also made them slightly more glowing (using screen blending mode and gaussian blur) but I'll return to that later on to make them even brighter.

- 7: source 7
step 8 of 12
Added baloons from a PNG file offered by "Bluesse" on Deviantart.
Added gaussian blur to them and lowered opacity slightly to get them more transparent.
Added gaussian blur to them and lowered opacity slightly to get them more transparent.

- 8: source 8
step 9 of 12
In this step I added the poppie field with blending mode overlay.
I also added some birds using a free brush, but the reason for which I didn't put the link to the brush is that I've changed my mind and got rid of them by cropping the image later on.
I also added some birds using a free brush, but the reason for which I didn't put the link to the brush is that I've changed my mind and got rid of them by cropping the image later on.

- 9: source 9
step 10 of 12
Here I cropped the image as the sky seemed too big and made meI kind of loosing the focus point, which was: the carrousel.

step 11 of 12
Here I added more glow to the Christmas lights by using a soft yellow brush on top of each light bulb and then changing the blending mode to screen and lowering the opacity.

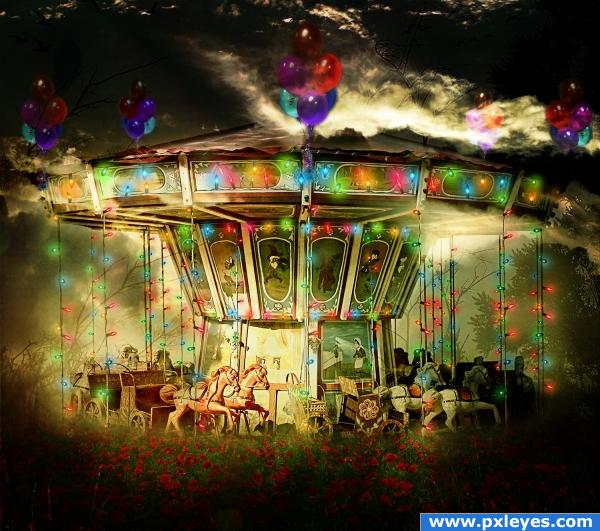
step 12 of 12
Finally I added a brightness/contrast adjustment layer, added some high pass filter (4 pixels radius) for high definition and lowered opacity till I was satisfied with the result.

Final result
Pxleyes
Photography and photoshop contests
We are a community of people with
a passion for photography, graphics and art in general.
Every day new photoshop
and photography contests are posted to compete in. We also have one weekly drawing contest
and one weekly 3D contest!
Participation is 100% free!
Just
register and get
started!
Good luck!
Follow us:


© 2015 Pxleyes.com. All rights reserved.