
Original image
step 1 of 15
Open the source image. Draw an elliptical shape for the top.

step 2 of 15
Convert shape to raster layer and add inner bevel.

step 3 of 15
create bottom with rounded rectangle shape. In this picture, you see that only my stroke has color, but I undid this and put the blue color as my fill color also.

step 4 of 15
point to one of the bottom nodes and hold Ctrl while moving and it will lengthen or shorten only that side.

step 5 of 15
move that layer behind the other layer

step 6 of 15
erase the part you don't need

step 7 of 15
bring the opacity down so you can erase the blue where the bubbles are.

step 8 of 15
remove the flow from the bottle by cloning the bubbles. merge the two layers and select the bath so you can erase the background. Clean up the dark spots.

step 9 of 15
select your bath and add a new layer and pick the same color as the bath, but a few shades darker. color where you want some shading (because it is selected, it is easier not to go past end of bathtub).

step 10 of 15
add a gaussian blur

step 11 of 15
make a vector shape in yellow for your feet. right click so you can edit nodes

step 12 of 15
to add nodes, point to the area and hold Ctrl and click. arrange your nodes

step 13 of 15
for this, add enamel. I duplicated it and then made the back feet the same way.

step 14 of 15
for this shadow, make a new vector shape in the same shape as your bathtub, turn it upside down and stretch it by holding Shift and pulling the node. Add gaussion blur and bring brightness up

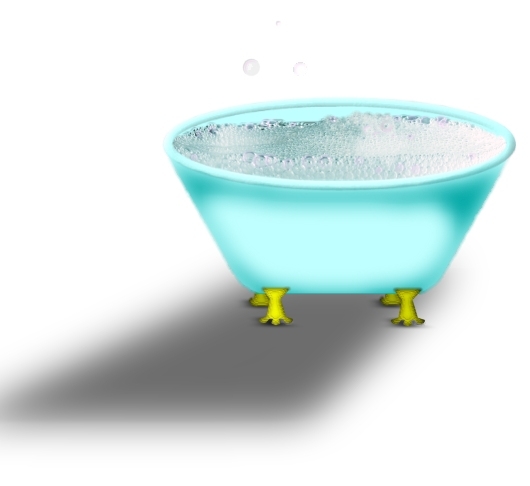
step 15 of 15
add a little color to some of the bubbles by using the circle selection tool and make a circle around a bubble, then use the cutout with pink. This is how you make your own bubbles too. Use the cutout

Final result
Pxleyes
Photography and photoshop contests
We are a community of people with
a passion for photography, graphics and art in general.
Every day new photoshop
and photography contests are posted to compete in. We also have one weekly drawing contest
and one weekly 3D contest!
Participation is 100% free!
Just
register and get
started!
Good luck!
Follow us:


© 2015 Pxleyes.com. All rights reserved.