
Original image
step 1 of 10
Use the wet media brushes to create a scene, draw over the original image to get lots of lines, texture, a mess..

step 2 of 10
Use the normal, color, dodge and multiply brush to add color and feel to the scene.

step 3 of 10
Duplicate the original in a new layer on top, resize it using transform; perspective and distort.

step 4 of 10
Delete the parts you do not want with the eraser tool. You can change the opacity of the layer(75%) you want to erase parts from so you can see what needs to be removed.

step 5 of 10
Make some cracks using multiply tool, make the edges on either side of the cracks a little bit lighter.

step 6 of 10
The same as the previous steps, duplicate layers and transform.

step 7 of 10
Make the cracks.

step 8 of 10
Make a lightsource of some kind, I made a fire. Use the color brush(yellow and orange) for the surrounding objects and the burning wood. Use dodge with the same colors for the brighter parts, especially the center of the fire.

step 9 of 10
Now give the figure a character. I had the idea of the cape from the beginning.

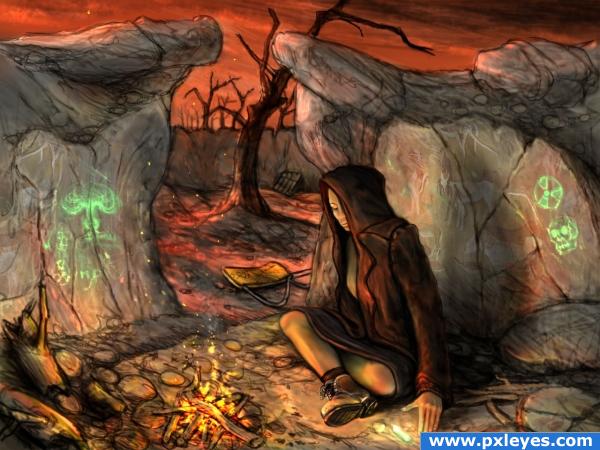
step 10 of 10
Last step is working out the details. Just look at your drawing for a while and things wich look wrong will come up. I changed the fire, I felt it was to big and not in the right place. I changed the hood, added a chair, and very important the shoe needed a different perspective.

Final result
Pxleyes
Photography and photoshop contests
We are a community of people with
a passion for photography, graphics and art in general.
Every day new photoshop
and photography contests are posted to compete in. We also have one weekly drawing contest
and one weekly 3D contest!
Participation is 100% free!
Just
register and get
started!
Good luck!
Follow us:


© 2015 Pxleyes.com. All rights reserved.