
Original image
step 1 of 16
The stars were duplicated various times and their positions were changed slightly to create the illusion of a larger amount of stars

step 2 of 16
The deep space brushes were used

step 3 of 16
The cliff top was extracted, important and flipped vertically

step 4 of 16
The different lighting from the two deep space brushes were added in the form of Colour Balance adjustments

step 5 of 16
This is the image with the correct lighting

step 6 of 16
This is my layers palatte at this point

step 7 of 16
A border around the selection of the cliff top was added

step 8 of 16
The border was 6 pixels

step 9 of 16
gaussian blur was now added to soften the edges of the cliff top

step 10 of 16
The cathedral was added

step 11 of 16
This is my layers palatte at this point

step 12 of 16
a shadow was added

step 13 of 16
water brushes were added

step 14 of 16
tree brushes were added and a shadow was created

step 15 of 16
this is my layers palatte at this point

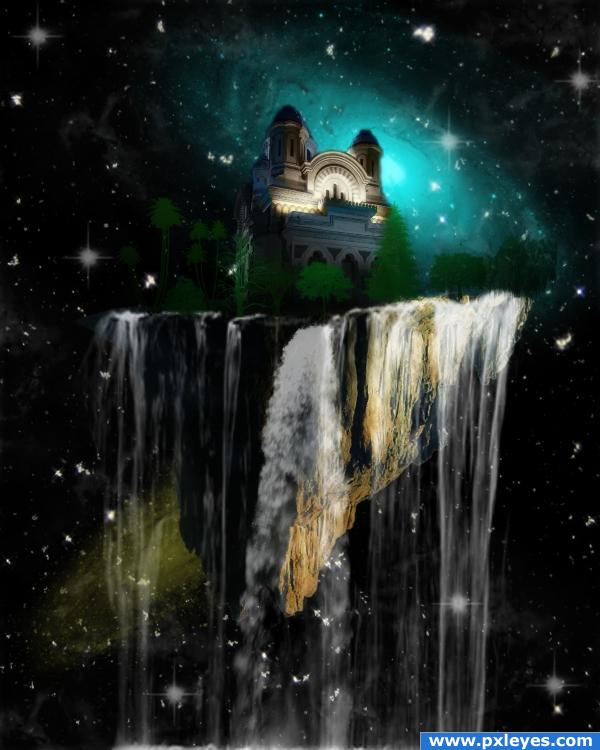
step 16 of 16
That's it!

Final result
Pxleyes
Photography and photoshop contests
We are a community of people with
a passion for photography, graphics and art in general.
Every day new photoshop
and photography contests are posted to compete in. We also have one weekly drawing contest
and one weekly 3D contest!
Participation is 100% free!
Just
register and get
started!
Good luck!
Follow us:


© 2015 Pxleyes.com. All rights reserved.