
Original image
step 1 of 4
Started with the background picture and duplicated it. Then sphereized it a few times to get the shape I wanted. Then I simply selected the right size ball and deleted everything else.

step 2 of 4
Easy part, just put the other duplicate layer behind the ball and lined them up (kinda)

step 3 of 4
I masked out the parts of the source I didn't want and slipped that in behind the ball

step 4 of 4
CTRL+Click the ball layer to select it and then inversed the selection. Then, duplicating the hand layer I deleted everything but the finger tips that were behind the ball. I put them in front of the ball and used Polor Coordinates, Liquify, and some free transforming to get the shape I wanted. I know they don't line up perfectly with the hand, but pick up a glass ball sometime and I bet yours won't either.
The final touches were to add a slight glare to the top of the ball and a soft shadow on the hand.
Ta Da!
The final touches were to add a slight glare to the top of the ball and a soft shadow on the hand.
Ta Da!

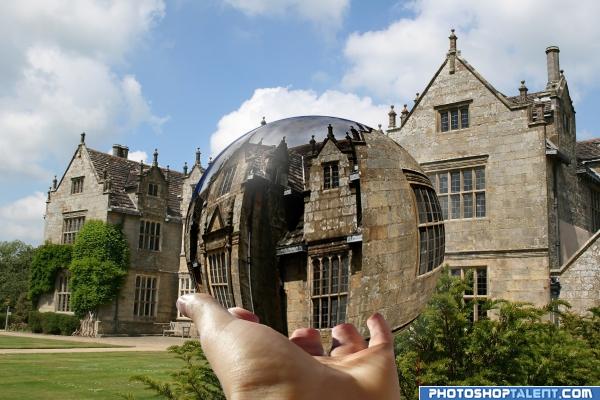
Final result
Pxleyes
Photography and photoshop contests
We are a community of people with
a passion for photography, graphics and art in general.
Every day new photoshop
and photography contests are posted to compete in. We also have one weekly drawing contest
and one weekly 3D contest!
Participation is 100% free!
Just
register and get
started!
Good luck!
Follow us:


© 2015 Pxleyes.com. All rights reserved.