
Original image
step 1 of 8
First took the source photo and laid it against a blue color background...
Any color will do... I choose light blue since it is simple yet nice to look at... Plus with this setup, it's less distracting...
Any color will do... I choose light blue since it is simple yet nice to look at... Plus with this setup, it's less distracting...

step 2 of 8
Now taking the pen tool, made a trace of the left speaker...
It doesn't matter in which order you trace the part, but it's advisable to start with front object and then to back object( bottom to top)...
Also I named the layer properly... It's better to name it carefully...
Otherwise it's hard to arrange layer when they are named layer 1, layer 2, layer 3, etc... In this case there are lots a layer in the end...

step 3 of 8
Now making the path a selection, copying the speaker and pasting it... This is what I get...
As you can notice there are some white part at the speaker's border... Now we don't need that... So I painted black over it...
As you can notice there are some white part at the speaker's border... Now we don't need that... So I painted black over it...

step 4 of 8
After cleaning up, I get a smooth image of the left speaker...
Also while converting the path to a selection, I choose feather of 0 px, since I want the edges to be sharp...
Also while converting the path to a selection, I choose feather of 0 px, since I want the edges to be sharp...

step 5 of 8
Now in the same way I traced and edit the area around the left speaker area...
I have marked in the ss which parts I have broken...
Also I group all this objects into a layer group conveniently named "Left speaker area"...
I have marked in the ss which parts I have broken...
Also I group all this objects into a layer group conveniently named "Left speaker area"...

step 6 of 8
I reused some of the smaller object that appear more than once... Too lazy to trace them again and again...
So in this way I traced the other section of the tape recorder as well...
So in this way I traced the other section of the tape recorder as well...

step 7 of 8
I can't show all my layers and it's arrangement... But I do can show the arrangement of my layer groups...
My arrangement is as show in the figure, cause I want both of the speaker section to come out above the middle section i.e. the place where the cassette goes in...
My arrangement is as show in the figure, cause I want both of the speaker section to come out above the middle section i.e. the place where the cassette goes in...

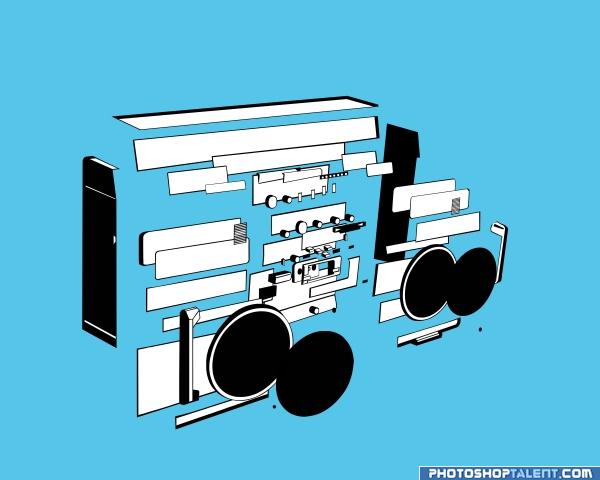
step 8 of 8
Now finally arranging the cut out objects, I get this...
One can arrange it as he/she wishes... And I didn't add any insides, cause I didn't want it to be real or realistic or a blueprint type...
Just was having fun with the image or so to say the lineart...
One can arrange it as he/she wishes... And I didn't add any insides, cause I didn't want it to be real or realistic or a blueprint type...
Just was having fun with the image or so to say the lineart...

Final result
Pxleyes
Photography and photoshop contests
We are a community of people with
a passion for photography, graphics and art in general.
Every day new photoshop
and photography contests are posted to compete in. We also have one weekly drawing contest
and one weekly 3D contest!
Participation is 100% free!
Just
register and get
started!
Good luck!
Follow us:


© 2015 Pxleyes.com. All rights reserved.