
Original image
step 1 of 9
First of all I masked out the car, placed it in the center of the picture, a little transform were applied.

step 2 of 9
Now using quick mask selected wheels, desaturated them, then body -}hue/saturation to give it new red color and window became blue)

step 3 of 9
Used scratc brushes to draw scratches 8)

step 4 of 9
Added background, drew fires on it (filled with yellow to orange gradient) and blurred everything with gaussian blur 12-15 pxl.

- : source
step 5 of 9
Added explosions (download some explosion brushes from inet) applied layer effects gradient orange to red and yellow to orange.

step 6 of 9
Created new layer - render clouds with yellow on foregrond and orange on background, duplicated it 2 times, changed blending of the top layer to color burn and opacity to 70%, middle layer to color dodge and same opacity. Played with hue/saturation to give it more "explosive" look! Then merged 3 layers with clouds, copied it 2 times, placed all of them over each explosion and created clipping mask.

step 7 of 9
drew sparks (with sparks brushes=) under explosion layers, applied outer glow and changed blending to luminocity.

step 8 of 9
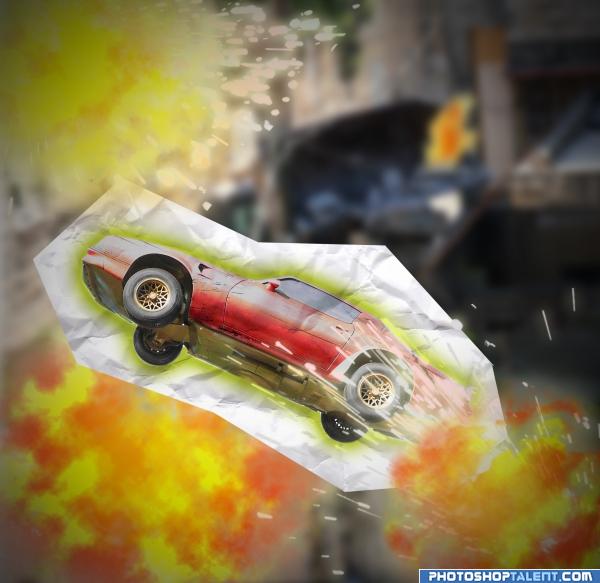
Took a photo of crushed paper (which you can make the same way i did, all you need is photocamera, sheet of paper, at least 1 free hand and 2-3 minutes of spare time) placed it under the car level, made rough selection using polygonal lasso tool and erased unimportant part.

step 9 of 9
Added greenish outer glow effect to the car and blending mode changed to hard light.
And little cherry on top which you can see in the final result vignette effect (darken edges) toadd some drama to the picture. That's it! Hope you like my entry and tutorial.
And little cherry on top which you can see in the final result vignette effect (darken edges) toadd some drama to the picture. That's it! Hope you like my entry and tutorial.

Final result
Pxleyes
Photography and photoshop contests
We are a community of people with
a passion for photography, graphics and art in general.
Every day new photoshop
and photography contests are posted to compete in. We also have one weekly drawing contest
and one weekly 3D contest!
Participation is 100% free!
Just
register and get
started!
Good luck!
Follow us:


© 2015 Pxleyes.com. All rights reserved.