
Original image
step 1 of 12
i firstly crop what i would need, for this artwork i only need the bird and the lamp, the bird would be inside so i need the lamp first

step 2 of 12
finaly i caught the bird and threw it in.

step 3 of 12
the bird is built in couple of layers and diferent blending modes, you know sometimes photoshop magic comes in while working! especially around midnights. i applied a hazy dubbs of white lightly to put the bird inside, but the bird is resisting, i had to chase it the whole night, i even tried the flying thing!!!

step 4 of 12
For the background, i duplicated the lamp layer and applied the blending mode 'hard light' to both of them, over white background, and aplied gaussian and motion blur to the bird, for motion.

step 5 of 12
here i selected with magic wand tool, the highlight parts of the lamp, and duplicated a couple of times, so it puts the bird inside the lamp.

step 6 of 12
I made bubbles manually, and sized them diffetently, and worked on the bottom of the lamp to give depth of space.

step 7 of 12
The bird is pretty much caged now so i have to create an underwater scene, since we do not have a background for now!!

step 8 of 12
background's first brick is laid. by on a layer filled with black, go to filter-render and select clouds, then from here starts the journey under water!

step 9 of 12
toggled with blending modes a bit, still waiting for fotoshop magic to happen

step 10 of 12
Applied plastic wrap to our blue clouds, and under transform-free transform and toggled with perspective so it looks like under water, i softened the edges with smudge, blur and erased some to end up here!

step 11 of 12
our blue clouds are duplicated and softened and pushed back to enhance the under water, drew a star kind of shape with lasso tool and filled it with white, Gaussian blurred it heavily to end up in a sun ray, the back is pretty much done. and guess whats next.... our old friend the caged sea gull!!!

step 12 of 12
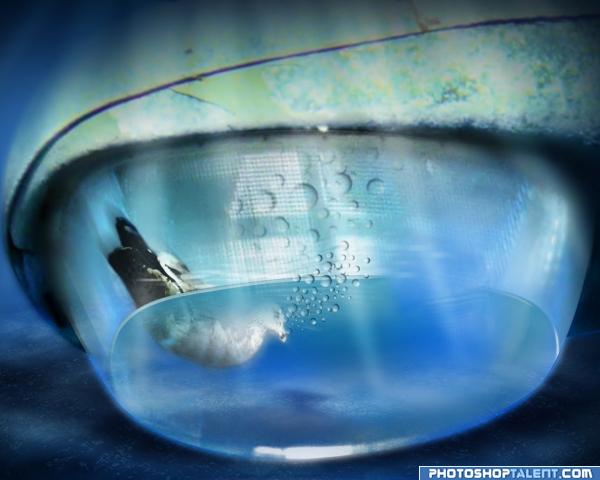
and finaly the bird and the tank, rests in peace, i put a black layer on top and erase the from the middle outwards to finally blent the two artworks, remember the sun shape!!! it sits on top, then BOOOM!

Final result
Comments
Pxleyes
Photography and photoshop contests
We are a community of people with
a passion for photography, graphics and art in general.
Every day new photoshop
and photography contests are posted to compete in. We also have one weekly drawing contest
and one weekly 3D contest!
Participation is 100% free!
Just
register and get
started!
Good luck!
Follow us:


© 2015 Pxleyes.com. All rights reserved.
Sorry guys i never thought it would be this hard explaining the step-by-step, its for the first time, next time i'll be on point. i wish to big up people who write understandable tutorials in this forum, its hard but i'll try to write the way i would wana read a tutorial.
(5 years and 4056 days ago)No reason to say sorry, the guide is very entertaining

(5 years and 4055 days ago)