
Original image
step 1 of 9
make source image so it is a complete circle.

step 2 of 9
bring new source image into liquify and then bloat all the bolts (filter - liquify - blaot tool) then when complete put a small lens flair in each bolt then change color and contrast (levels)

step 3 of 9
bring into liquify again and use the bloat tool to bloat a few of the bolts.

step 4 of 9
filter - liquify - use warp tool and shape your image

step 5 of 9
closecut and bring into liquify and use warp tool to make tail thin and bloat tool to make head round

step 6 of 9
your image should look like this.Duplicate and flip new layer and bring close to one another

step 7 of 9
your image should now look like this.

step 8 of 9
now you must make a third image and bring it into the image that has two heads and stems and do some closecutting and blending so you have one three headed image

step 9 of 9
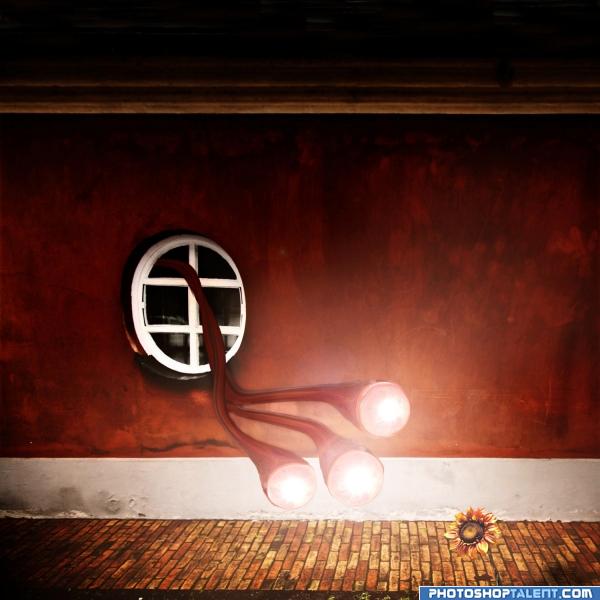
bring three headed light into background image position and also bring sunflower in flatten then duplicate flattened layer and multiply and add a mask so you can eliminate some of the image to give the illusion of light.
This is the best that I can describe this finished picture.
This is the best that I can describe this finished picture.

Final result
Pxleyes
Photography and photoshop contests
We are a community of people with
a passion for photography, graphics and art in general.
Every day new photoshop
and photography contests are posted to compete in. We also have one weekly drawing contest
and one weekly 3D contest!
Participation is 100% free!
Just
register and get
started!
Good luck!
Follow us:


© 2015 Pxleyes.com. All rights reserved.