
5 Creative Ways You Can Use Image Compression
In web design, the term “compression” usually refers to the technique used to decrease the size of image files. There are creative ways to use compression, however, and that’s what I’ll discuss in this article. Though compression can create unwanted artifacts in some cases, in others these artifacts can appear artistic and desirable. Accomplishing the generation of the right kind of artifacts requires a cursory understanding of how compression works in Photoshop and what techniques can enhance the output of compression.
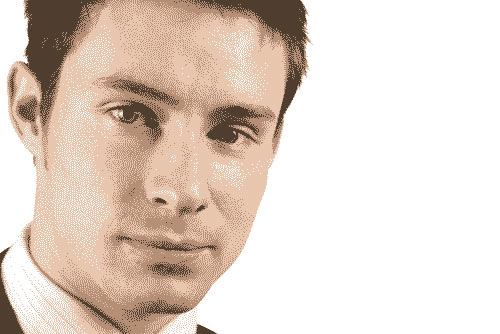 Here’s another photo using average settings: Adaptive palette, no dither, 4 colors, with some locked colors (more on that later):
 Generally speaking, 4-color compression works best with complex photographs with a lot of color, most of it undifferentiated. There is some additional processing you can apply to an indexed image, but if you’re looking for an interesting effect without much work, 4-color compression is the tool for the job.
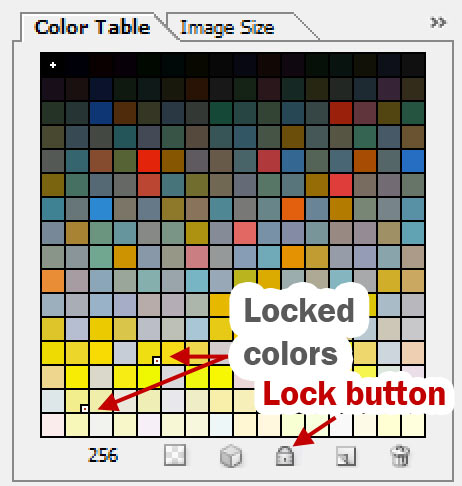
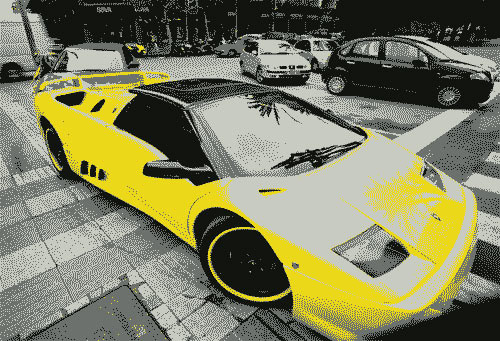 Though the environment is salvaged through the use of dithering, the hood of the Lamborghini lacks a lot of the vibrant yellow color. We can tell Photoshop to preserve certain colors when it compresses photos, so in this case, we want to preserve as much yellow as possible. This is easily done. On the following image, check out both how a locked color looks like and where the lock button is. To lock a color, simply click it, or use the Eyedropper tool to select it, and click the lock button.
 You can see the result of the locked colors in Section 1. What if we decided to lock only the reds (and black for contrast), as there seem to be quite a few of them in the picture? Here’s the result:
 There is considerable loss of detail, however this would be perfect as an element for a site (more on that later). The simplicity of the image makes a previously unimportant color stand out in a very bold way. Don’t forget to always lock a contrast color such as black or white. Unless you’re going for a very specific effect, locking black or white makes a compressed image look much better.
 We can see that the effect is pleasant, but there’s a little too much detail lost. The man’s features are almost entirely indiscernible. Let’s add dithering at 50% using the Diffusion method:
 Much better; we can see the outlines of the man’s jacket and shirt contrast with his neck and jawline. His facial features are now much more detailed. What if we set dithering to 100%?
 Not exactly as dramatic and stylish as the other two, but this effect has its uses. You can see how Photoshop attempts to approximate the photo faithfully, including the outline of the man’s face. This setting may look a bit noisy, but there are ways to turn it to your advantage.
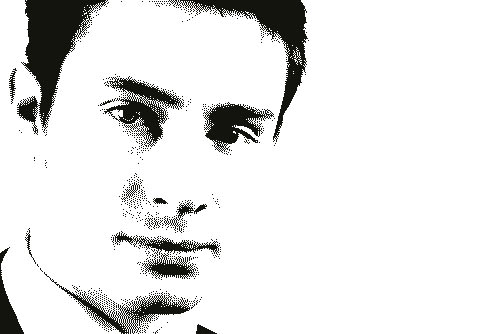
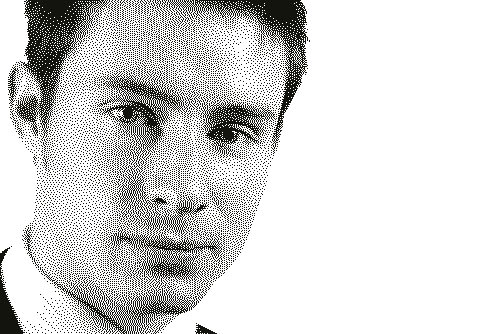
If you know how to use the Curves and Levels functions of Photoshop, 100% dithering with 2 colors can quickly become a go-to effect. Here’s a 100% dither with 2 colors, with the original and the levels-adjusted source:
Not exactly as dramatic and stylish as the other two, but this effect has its uses. You can see how Photoshop attempts to approximate the photo faithfully, including the outline of the man’s face. This setting may look a bit noisy, but there are ways to turn it to your advantage.
If you know how to use the Curves and Levels functions of Photoshop, 100% dithering with 2 colors can quickly become a go-to effect. Here’s a 100% dither with 2 colors, with the original and the levels-adjusted source:
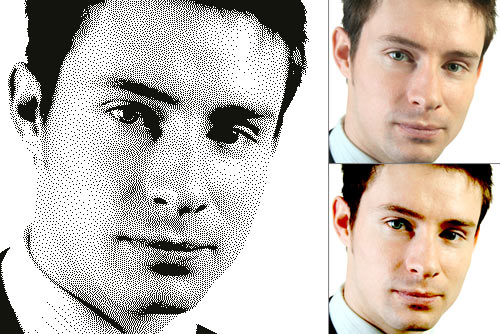 Now the result is at once dramatic and detailed. The general rule of thumb is: if you know how to use Curves and Levels, adjusting dither percentage is unnecessary as you can predict which colors the compression feature will favor (especially if you define them beforehand by locking them).
 Here we have a picture of a girl, compressed to 4 locked colors with 50% dithering:
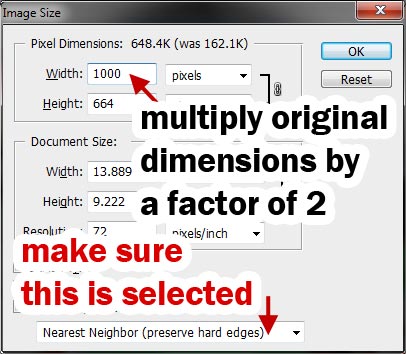
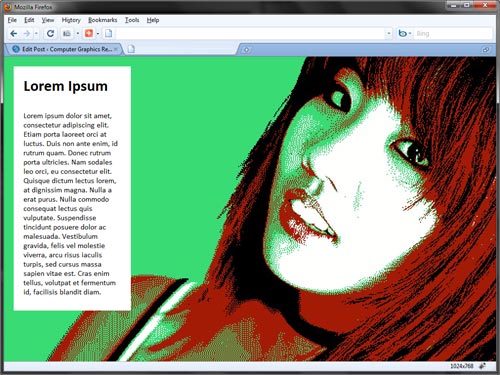
 Let’s double its size so we can use it as a background on a site.
 The applications for this technique are endless. For one, the resize-compressed-image-using-nearest-neighbor technique is entirely dimensions agnostic. The picture could have been small, but the result would have been just as sharp and striking. For two, a similar transformation done to the source JPEG would be more than double the size of the same GIF file, and it would look much worse.
Here’s what the picture would look like if the photo was resized to half its size, compressed, and then resized to four times its size:
The applications for this technique are endless. For one, the resize-compressed-image-using-nearest-neighbor technique is entirely dimensions agnostic. The picture could have been small, but the result would have been just as sharp and striking. For two, a similar transformation done to the source JPEG would be more than double the size of the same GIF file, and it would look much worse.
Here’s what the picture would look like if the photo was resized to half its size, compressed, and then resized to four times its size:
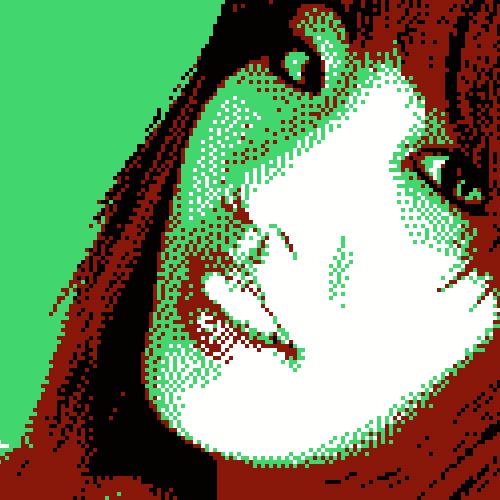 Using this for a background would be very interesting indeed. There’s a certain low-tech feel to this kind of processing which goes well together with compression.
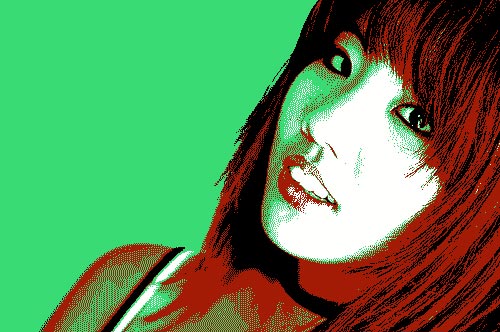
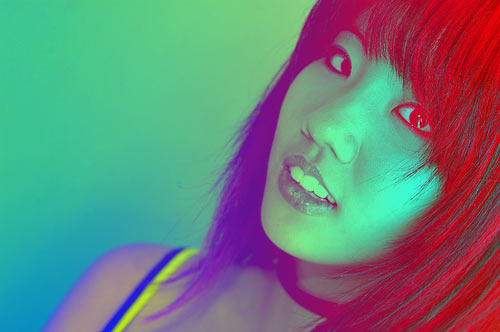 Achieving this sort of fill effect with a compressed image is tricky. If you lock the right colors and use the right settings, you can approximate it fairly closely. But why do the extra work when you can post-process your compressed image? Here’s the indexed version of the original with the color processing applied in full-color mode:
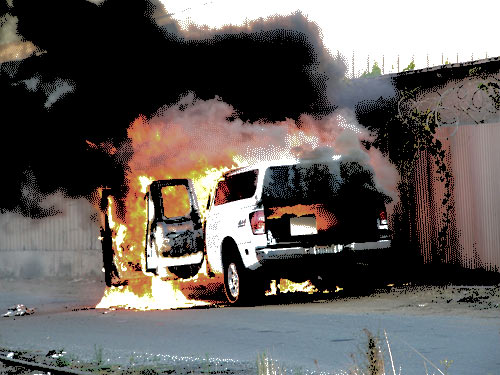
 Experimenting with full-color fills can yield a lot of interesting results. For example, you can use the original image as a color guide to the compressed image. Here’s a picture of a car set on fire:
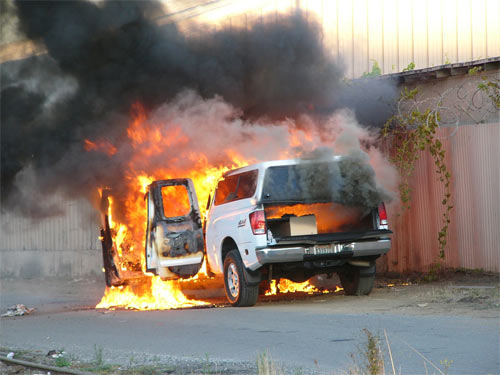 Here it is compressed:
 And here it is with the original added on top of it with the Linear Light blending mode:
 Note how smoothly the textures in the original integrate with the limited palette of the compressed version. This is a very subtle effect and can be used to introduce a lot of interesting variations on run-of-the-mill photographs.

1. Straightforward 4-Color Compression
Sometimes the most interesting results come from the least interesting configurations. Here is how a photo of a man looks using the Selective palette, Diffusion dithering set at 4 colors, and 100% dithering:2. Locking Colors with 2- and 4-color Compression
Sometimes compressing to a very small number of colors leads to a drab result. See the picture below for a sample of such a result:3. Experimenting with Dithering
Now that we know how to lock colors and reduce the palette, why not try experimenting with a crucial feature of the compression process known as dithering? Dithering is a technique that attempts to simulate the original image’s shading and coloring with a reduced color palette. Dithering is useful when too much detail is lost with too few colors used. In more practical applications, such as compressing photographs to reduce bandwidth, dithering is very useful at approximating the original photo’s color depth in almost perfect detail. In our case, however, we want to use dithering in unorthodox ways. Here’s a 2-color picture of a man with black and white locked, using the Adaptive palette and no dithering:4. Resizing Using Nearest Neighbor
Indexed images are particularly useful when creating simple backgrounds to use for websites. A limited palette doesn’t distract the user from the content and can make a great contrast to a full-color foreground element. However, not all background-size photos should be processed as-is and not all photos you’d want to use for backgrounds are sufficiently large. This is where non-smoothed resizing (or nearest neighbor resizing) comes in. Nearest neighbor resizing works just as if you zoomed in on the photo in Photoshop. You don’t see smoother pixels, you see bigger pixels. The same principles applies when resizing. All you have to do is select the Nearest Neighbor option and resize by a factor of 2.5. Use Smooth Fills with Indexed Images
Here’s the original photo of a girl with a bit of color processing:Conclusion
Ultimately, what you do with this technique has no boundaries. You can use it to make team members’ photos more stylish, or to set a particular mood for your portfolio site. Compression is very versatile and I hope you’ll find more uses for it than you previously thought possible after reading this article.Author: admin
Howdie stranger!
If you want to participate in our photoshop and photography contests, just:
LOGIN HERE or REGISTER FOR FREE
-
says:
-
says:
I like the effect of the last one imsky. Cool idea to use a clipped and compressed base with a linear light overlay of the original.
good job!
Spence.
( 2 years and 4835 days ago ) -
says:
employing these ‘effects’ is a weak tweak for imagery that are unable to stand on their own and tell the story.
( 2 years and 4834 days ago ) -
says:
Cool Effect. I like it very much. Thanks a lot.
( 2 years and 4810 days ago ) -
says:
Great tips and tutorial. Thanks for sharing.
( 2 years and 4629 days ago )
Pxleyes
Photography and photoshop contests
We are a community of people with
a passion for photography, graphics and art in general.
Every day new photoshop
and photography contests are posted to compete in. We also have one weekly drawing contest
and one weekly 3D contest!
Participation is 100% free!
Just
register and get
started!
Good luck!
Follow us:


© 2015 Pxleyes.com. All rights reserved.
Nice Article, I will try it to my pics to impress my friends,
( 2 years and 4854 days ago )Thanks